
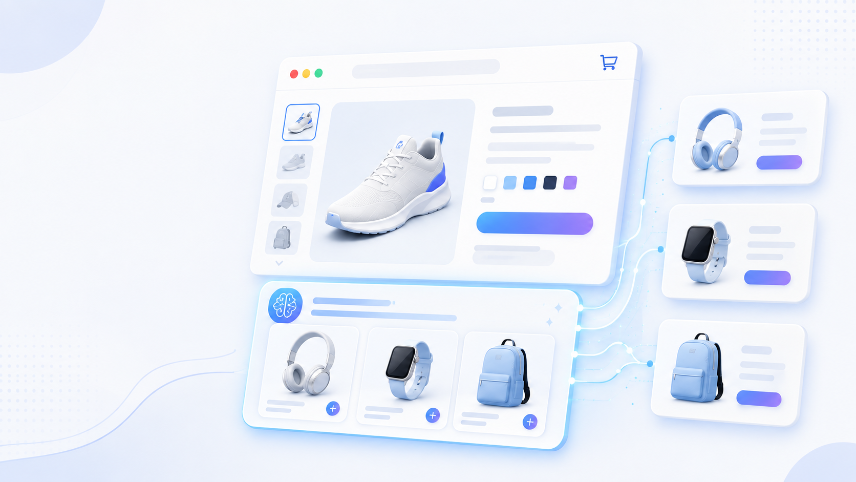
Most Shopify product pages waste their highest-intent moment — the exact second a shopper is already looking at a product — with static "related products" blocks that haven't changed in months. Here's exactly how to set up AI-powered recommendations that actually lift AOV, reduce bounce, and turn browsers into buyers.
Why Static "Related Products" Blocks Are Costing You
Every Shopify store has them. A row of four products, hand-picked once, sitting at the bottom of every product page. The problem isn't that the recommendations are there — it's that they're static.
Static blocks don't know:
- What the shopper just searched for
- What they've already viewed in this session
- What's trending this week
- What combinations actually get bought together
AI recommendation engines do. And the difference in conversion isn't marginal — it's the kind of lift that shows up clearly in your revenue dashboard within the first 30 days.
What AI Product Recommendations Actually Do
Before setup, it helps to understand what you're actually deploying.
An AI recommendation engine on your Shopify store does three things simultaneously:
- Analyses real purchase data It looks at what products customers actually buy together — not what you think they should buy together. If 40% of customers who buy your vitamin C serum also buy your SPF moisturiser within the same session, the AI knows that. Your hand-picked "related products" block probably doesn't.
- Responds to live session behaviour If a shopper has spent 3 minutes reading your premium candle product page, the AI weights its recommendations toward higher-price complementary items. If they came from a search for "gifts under £30", it weights toward bundles in that range.
- Improves over time without manual input Every purchase, every click, every add-to-cart event feeds back into the model. The recommendations get sharper the longer you run them — unlike a static block, which stays exactly as good (or bad) as the day you set it up.
Placement: Where to Put AI Recommendations on Your Product Page
Placement matters more than most merchants realise. Here are the three positions that work, ranked by typical conversion impact:
Position 1: Below the Add-to-Cart Button (Highest Impact)
This is the highest-intent zone on your product page. The shopper has just made a mental decision to buy — or is very close to it. Showing complementary products here catches them at the moment they're most open to spending more.
What to show here: Complementary items (not alternatives). If they're buying a coffee grinder, show filters, a cleaning brush, a storage canister — not another grinder.
Label it: "Complete the set" or "Customers also bought" outperforms "You might also like" in most A/B tests. Be specific about why the recommendation is there.
Position 2: Mid-Page Product Description Break
For products with long descriptions or specifications, a recommendation block mid-page can capture shoppers who are still in research mode but starting to think about what else they need.
What to show here: Frequently bought together bundles. Products that answer the "what else do I need to make this work?" question.
Position 3: Below the Fold (Traditional Related Products Area)
This is where most Shopify themes put recommendations by default. It still works — just less powerfully than the positions above. Use it for "More from this collection" or "Customers who bought this also viewed."
Once a shopper adds the recommended item, the cart becomes the next high-intent opportunity. Continue the journey with our guide to AI cross-sell recommendations on the Shopify cart page, including one-click add-to-cart and cart-aware recommendation rules.
The Cold-Start Problem (And How to Fix It)
Every new store running AI recommendations hits the same wall: the model needs purchase data to make good recommendations, but you need good recommendations to generate purchase data.
This is called the cold-start problem, and here's how to handle it correctly:
For new products (under 50 sales): Manually assign a "frequently bought together" group based on your merchandising knowledge. The AI uses this as a starting point and overrides it as real data comes in. Don't leave new products with no recommendations — an empty block is worse than a manually curated one.
For new stores (under 200 total orders): Use category-level recommendations rather than product-level ones. "More from our skincare range" is less precise than "customers who bought this also bought X" but far better than showing random products or nothing.
Timeline to expect:
- Weeks 1–2:Manual and category-level recommendations
- Weeks 3–6:Hybrid (AI starting to influence, manual as fallback)
- Week 7+:Full AI recommendations with meaningful accuracy
ReComAI Setup on Shopify: Step by Step
If you're using ReComAI specifically, here's the exact setup process:
Step 1: Install and Connect
Install ReComAI from the Shopify App Store and connect it to your store. The app pulls in your product catalogue and begins building its initial data model from your existing order history.
Time required: 2–5 minutes. There's no code to write at this stage.
Step 2: Choose Your Recommendation Zones
In the ReComAI dashboard, navigate to Product Pages → Recommendation Zones. You'll see a visual editor showing your product page layout.
Activate the zones in this order:
- Below Add-to-Cart (enable first, always)
- Mid-page break (enable if your descriptions are 300+ words)
- Below the fold (enable as a third zone, show "more from collection" here)
Step 3: Set Your Labels
Don't leave default labels on your recommendation blocks. Change them to match your brand voice and the specific recommendation type:
| Zone | Recommended Label |
|---|---|
| Below Add-to-Cart | Complete the set" or "Frequently bought together |
| Mid-page | You'll also need" or "Make the most of it |
| Below the fold | More from [Collection Name] |
Step 4: Configure the Cold-Start Rules
Go to Settings → Cold-Start Behaviour and set your fallback rules for:
- Products with fewer than 50 purchases:Use category match
- New products (added in last 30 days):Use manually assigned group
- Out-of-stock products:Exclude from recommendations automatically
Step 5: Set Your AOV Target
ReComAI's recommendation engine can be tuned toward different goals. In the Revenue Settings panel, set your target:
- Increase AOV:Weight recommendations toward higher-price complementary items
- Increase units per order:Weight toward lower-price add-ons and accessories
- Increase repeat purchase rate:Weight toward consumables and replenishment products
Most stores see the best results starting with AOV focus, then adjusting after 30 days of data.
The Mistakes That Quietly Kill Conversion
These are the errors that don't show up as obvious problems — they just silently suppress your recommendation performance:
Mistake 1: Showing Competitors to Your Own Products
If your AI recommends a product that's a direct alternative to what the shopper is currently looking at, you're essentially running a comparison test against yourself. The shopper may switch to the cheaper or different option rather than adding both.
Fix: In your ReComAI settings, enable "exclude direct alternatives" and define which product groups are substitutes rather than complements.
Mistake 2: Recommending Out-of-Stock Products
Nothing kills trust faster than clicking a recommendation and landing on a sold-out product page. Set your AI to automatically exclude out-of-stock items from all recommendation zones.
Mistake 3: Ignoring Mobile Layout
On mobile, recommendation blocks that look fine on desktop often stack awkwardly or show too many products. Two products per row, maximum, on mobile. Three or four looks cluttered and slows page load.
Mistake 4: Never Reviewing What's Being Recommended
Most merchants set up recommendations once and never check what's actually appearing. Schedule a monthly review of your top 20 product pages and spot-check what the AI is recommending. You'll occasionally find odd pairings that need a manual override.
Mistake 5: Treating All Traffic the Same
A first-time visitor from a paid ad and a repeat customer who's bought from you four times should not see the same recommendations. If your app supports customer segmentation (ReComAI does), set different recommendation strategies for new vs returning customers.
What Good Recommendation Performance Looks Like
Here are realistic benchmarks for Shopify stores with AI recommendations properly set up:
| Metric | Typical Range | Good Performance |
|---|---|---|
| Recommendation Click Rate | "8–15%" | 15%+ |
| Add-to-Cart from Recommendation | 3–8% | 8%+ |
| AOV Lift (vs no recommendations) | 12–25% | 25%+ |
| Revenue Attributed to Recommendations | 15–30% of total | 30%+ |
These numbers assume the recommendations are placed correctly (below the Add-to-Cart button, not buried at the bottom of the page), labelled appropriately, and updated regularly.
One Thing Most Guides Don't Tell You
-The biggest lever in recommendation performance isn't the algorithm — it's the product catalogue quality feeding into it.
If your product titles are generic ("Blue Dress"), your descriptions are thin, and your product tags are inconsistent, the AI has less signal to work with. Better-organised catalogue data leads directly to more accurate recommendations.
Before you invest time in recommendation placement optimisation, spend 30 minutes improving your product tagging structure. Tag products by:
- Material or ingredient
- Use case or occasion
- Customer segment (gift, professional, everyday)
- Complementary product groups
The AI picks these signals up and uses them to make more accurate recommendations from day one.
Frequently Asked Questions
Next Steps
If you're running Shopify and haven't set up AI recommendations on your product pages yet, start with the highest-impact change: move your recommendations above the fold and below the Add-to-Cart button, and change the label to "Complete the set" or "Frequently bought together."
That single change, done correctly, is responsible for a significant portion of the AOV lift most stores see when they first switch from static to AI-powered recommendations.
If you want to see how ReComAI handles this specifically for your store's catalogue and traffic patterns, you can book a 30-minute walkthrough using the link below.
Keywords