How to Set Up and Integrate Your OpenAI API Key & Pinecone in ReComAI
Enable AI-powered chatbots by connecting OpenAI and Pinecone correctly
If you want to power your chatbot with AI capabilities like content understanding or generation, you need to integrate your OpenAI API key.
This guide walks you through how to get a free key, integrate it into ReComAI, and validate it.
Step 1: Get Your Free OpenAI API Key
Create a free OpenAI account.
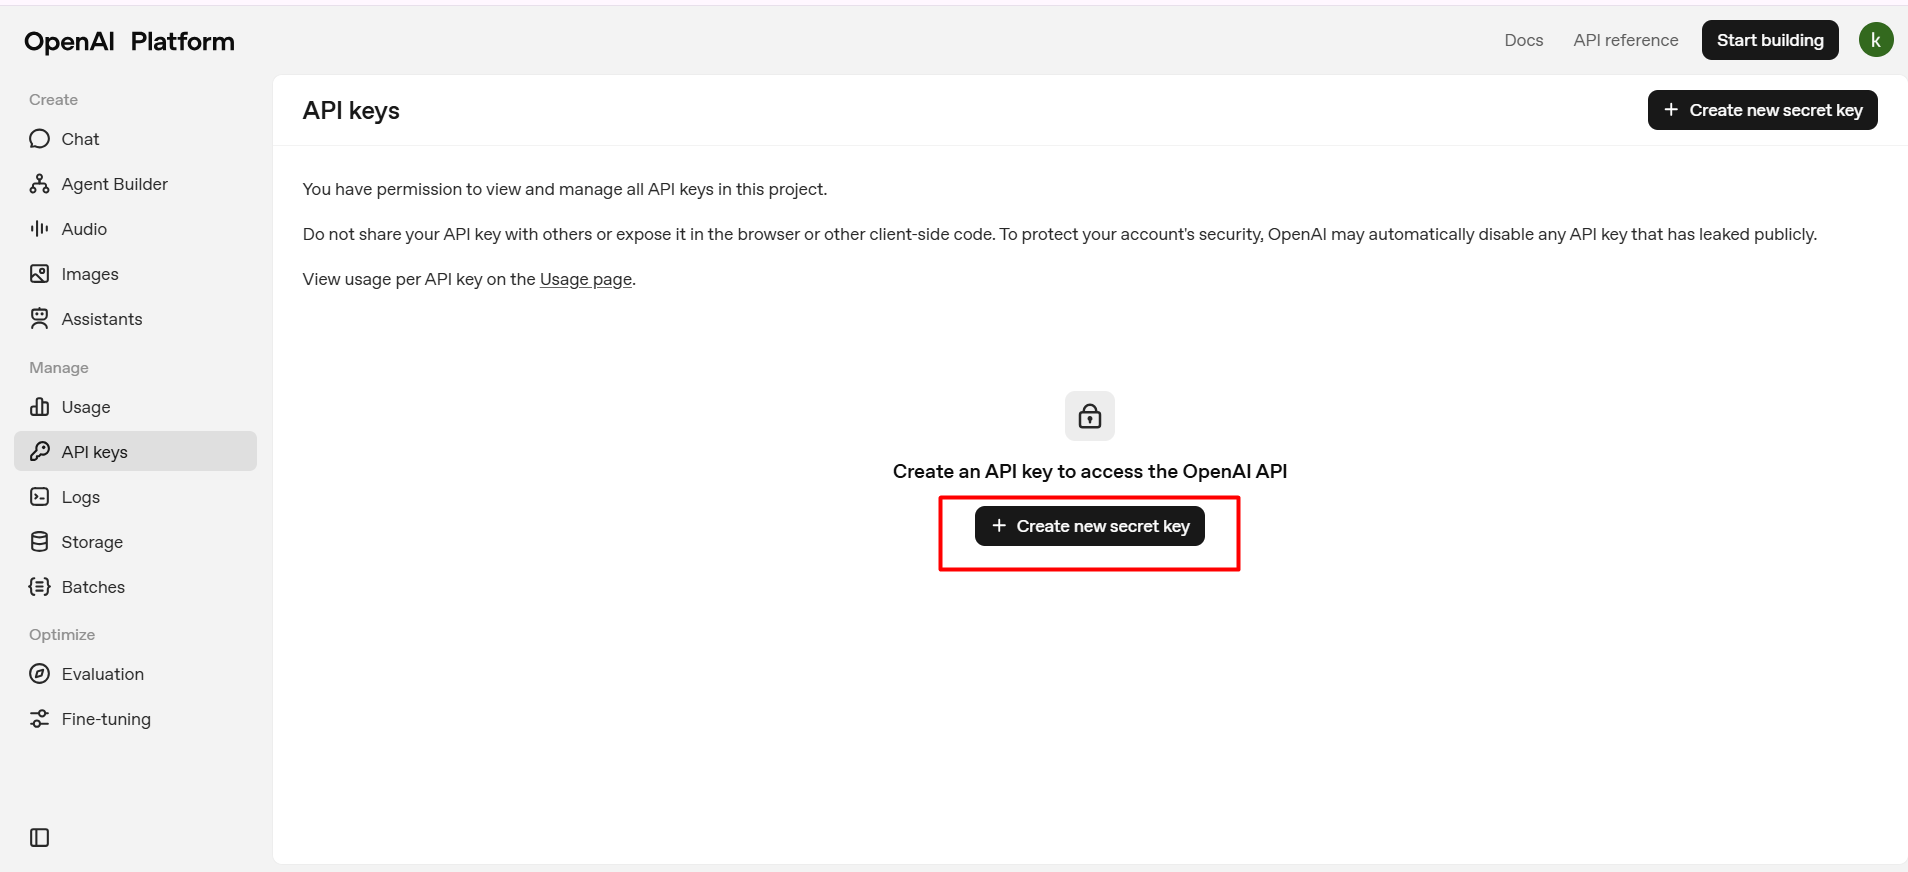
Once logged in, go to https://platform.openai.com/account/api-keys
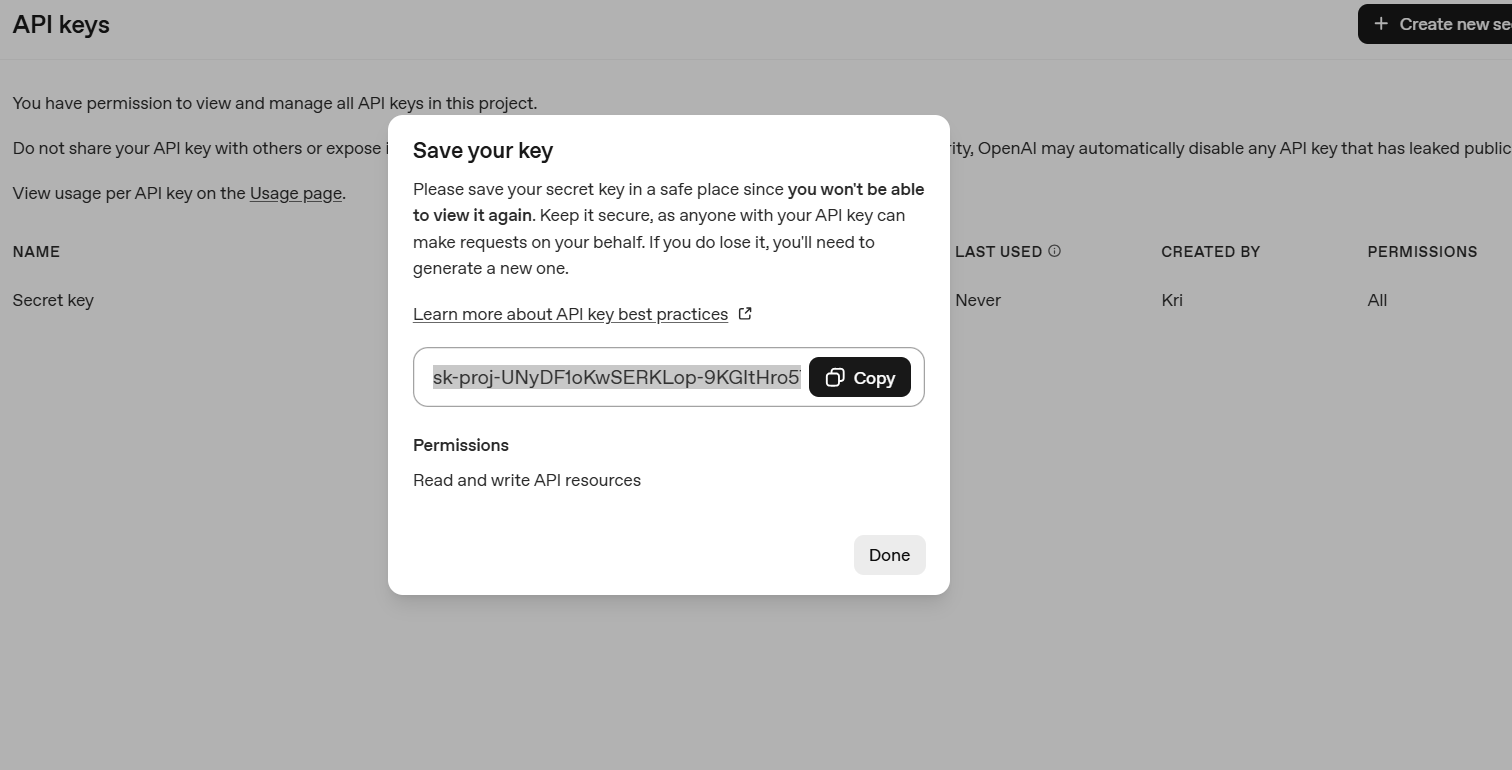
Click “Create new secret key”.
Copy the generated key (it starts with sk-...).
Note: Free-tier keys have limited quota, suitable for testing and small-scale usage.
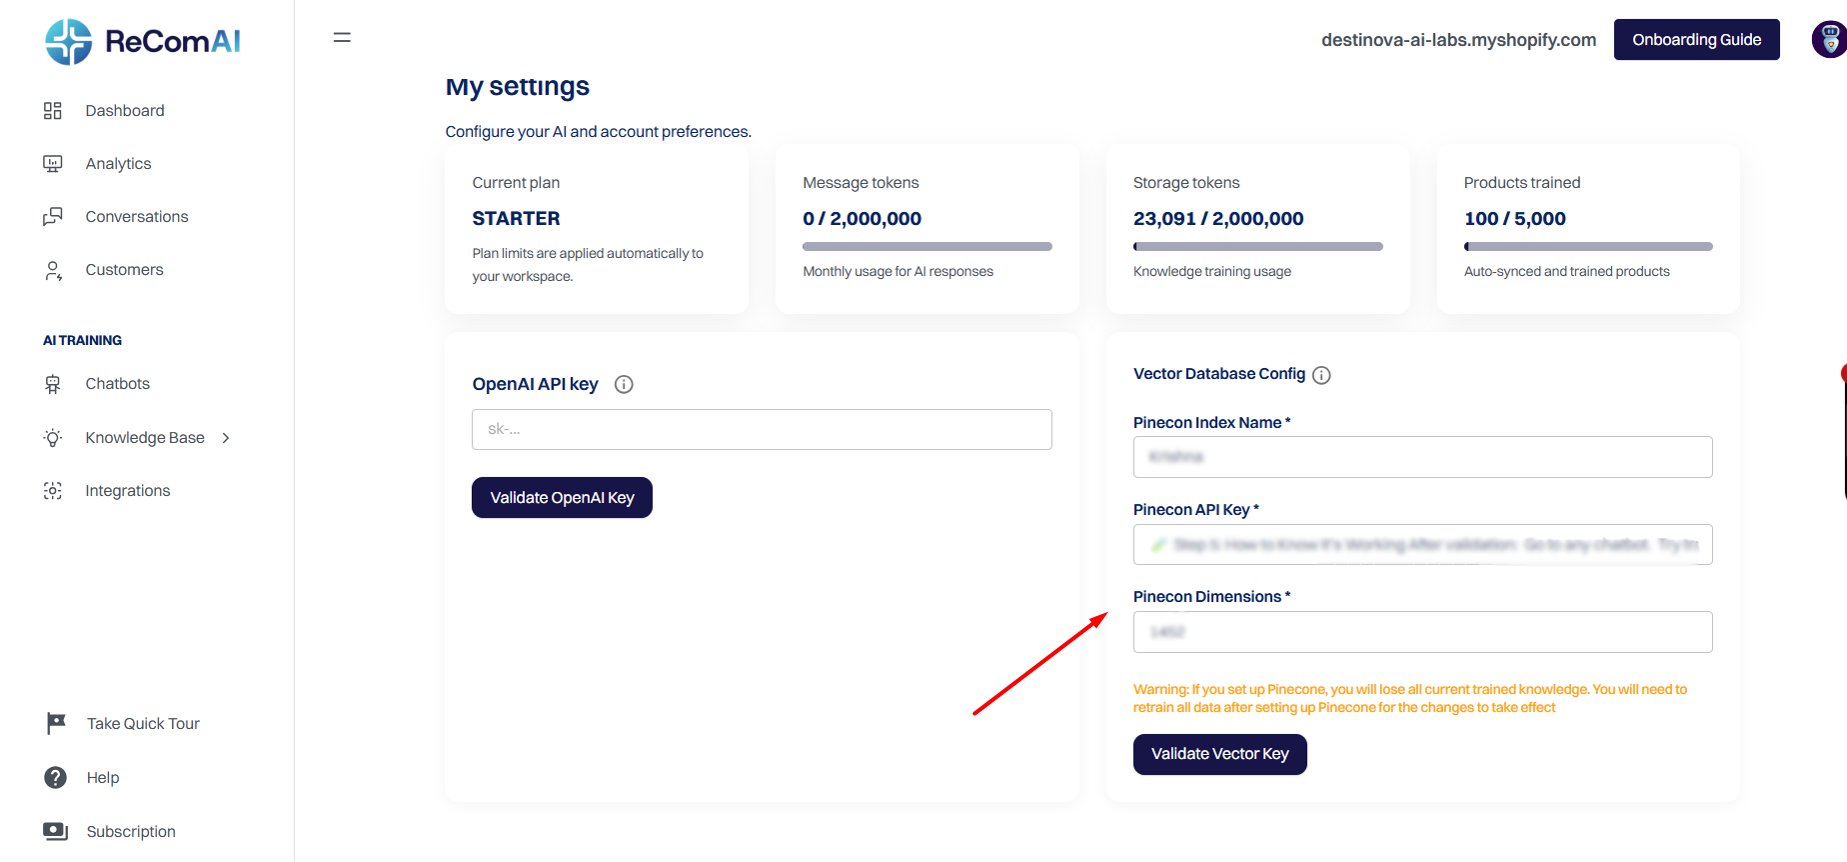
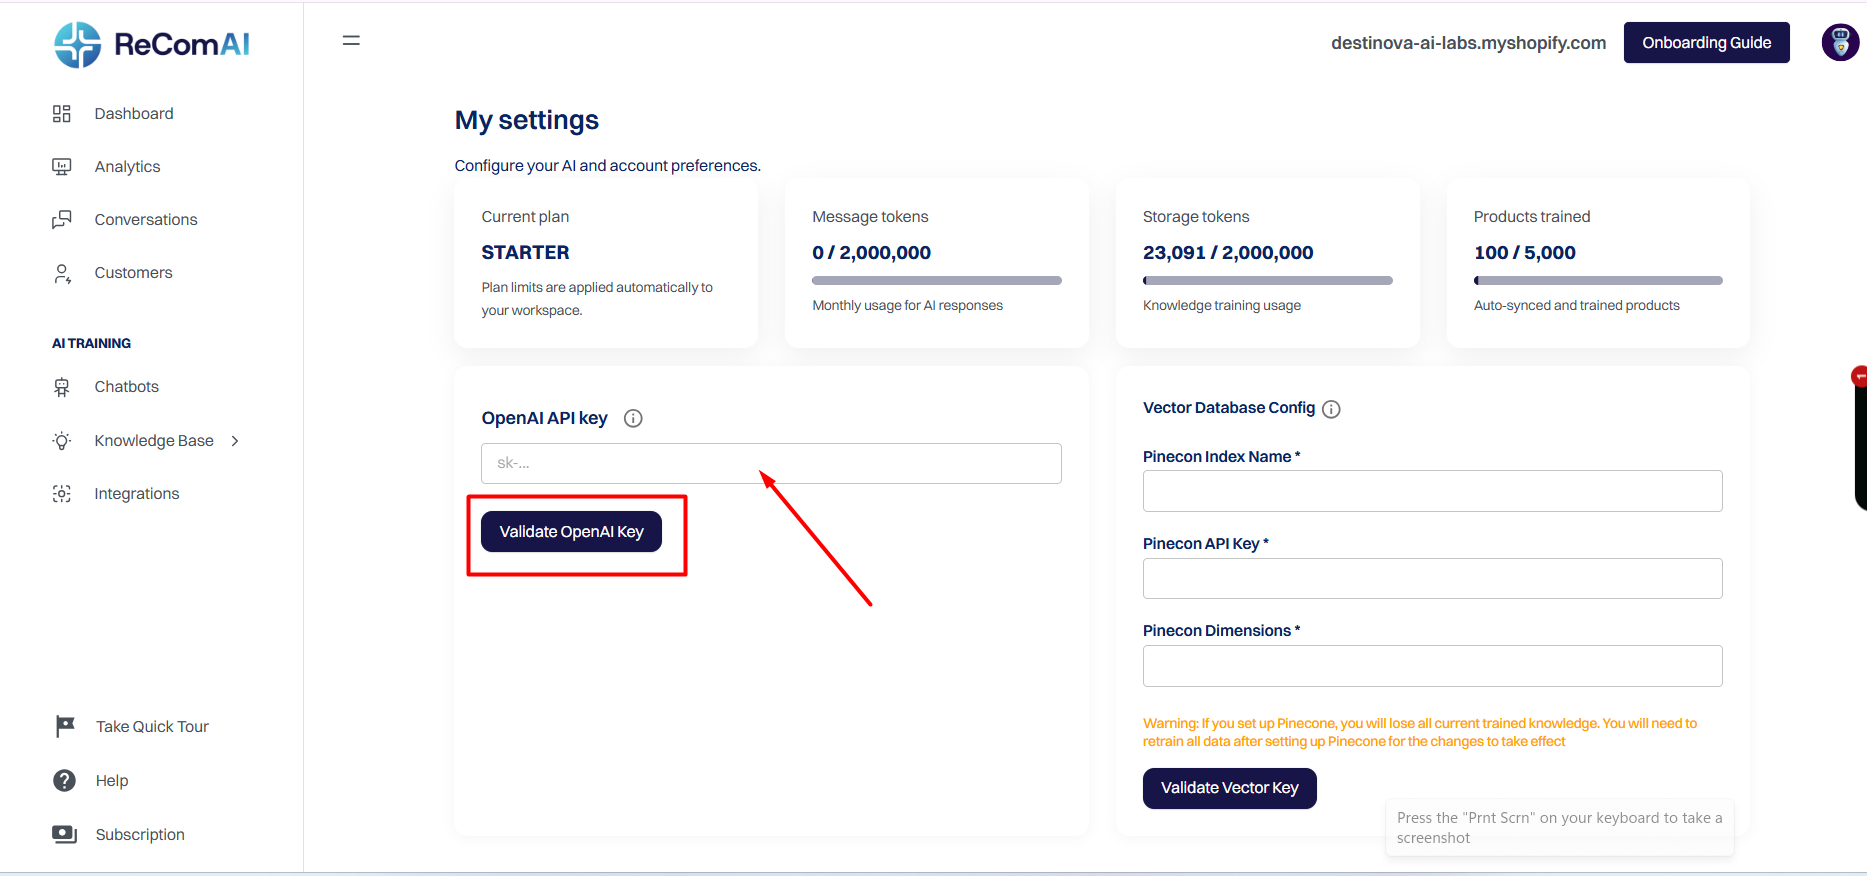
Step 2: Open the Settings Page in ReComAI
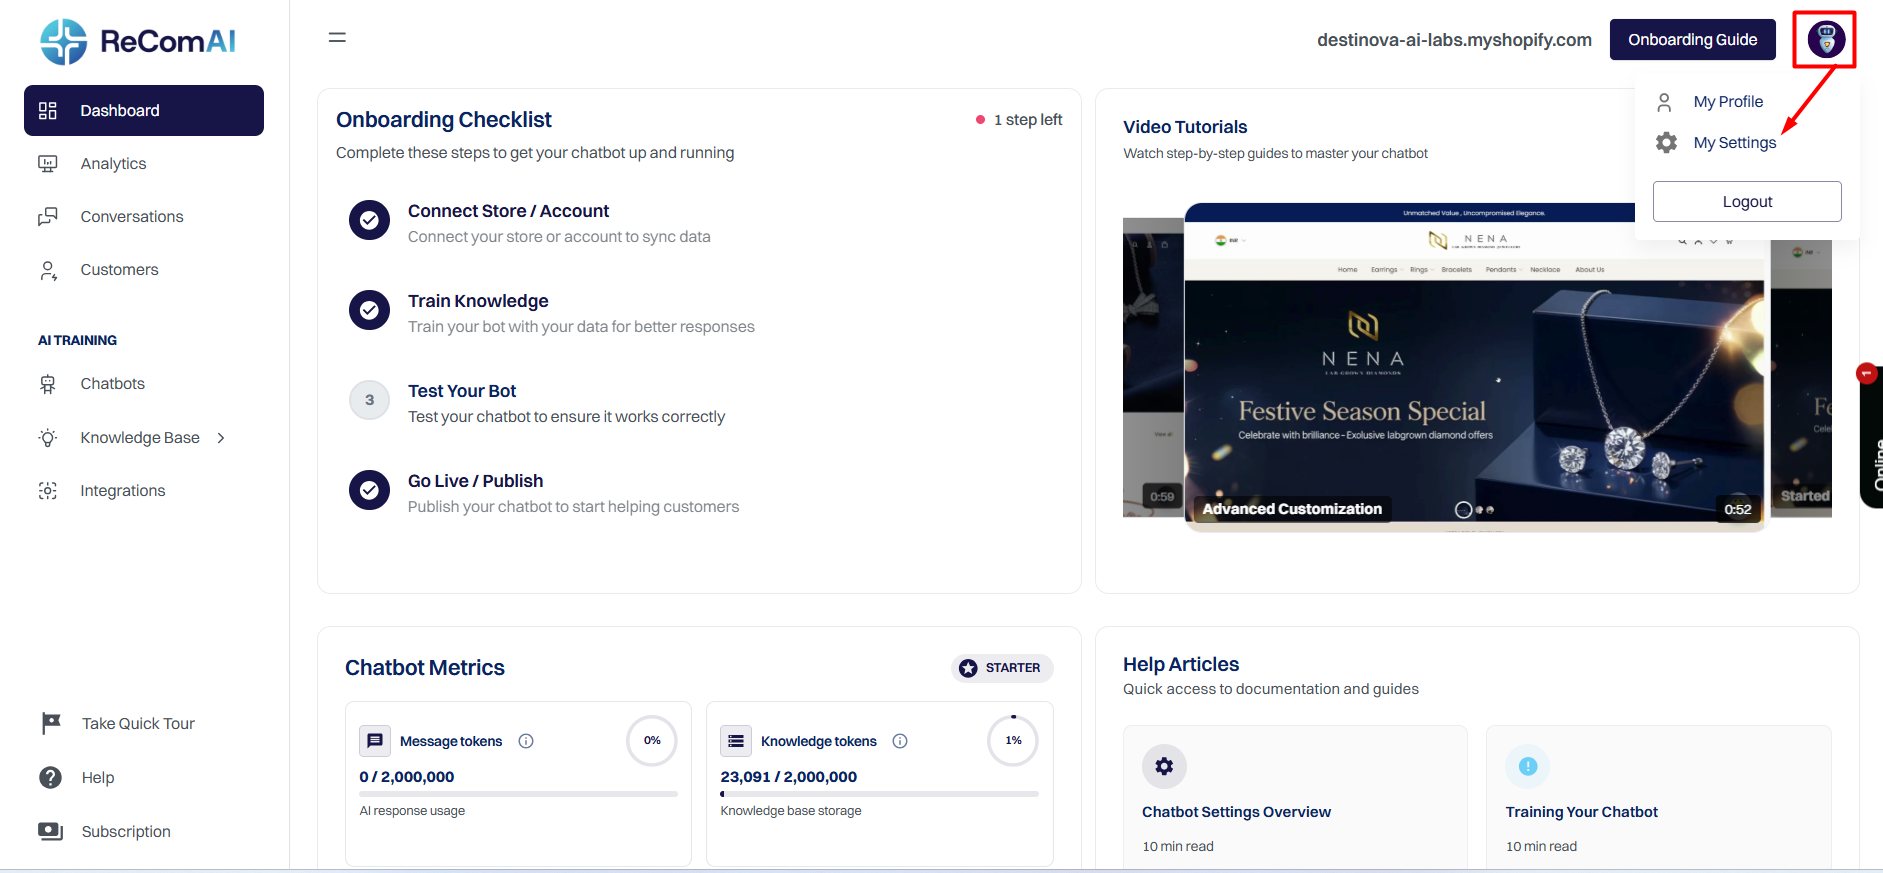
Log in to your ReComAI dashboard
Click on the profile or settings icon in the top-right corner
You will land on the My Settings page
Step 3: Enter Your OpenAI Key
As shown in the screenshot:
Paste your OpenAI key in the field labeled “Open AI key”.
Click the “Validate Open AI Key” button.
Step 4: Validate and Test the Key
After validation, the system will:
Verify if the API key is active
Enable AI training and chatbot responses if valid
You’ll see success or error messages indicating the status of your key
Step 5: How to Know It’s Working
After validation:
Go to any chatbot.
Try training a product, asking a chatbot question, or generating AI responses.
If working correctly, the responses will be generated using OpenAI.
Security Tip
Keep your API key secure. Do not share it publicly.
Rotate or delete the key from your OpenAI account if exposed
Pinecone Free Setup Guide
Step 1: Sign Up for Pinecone
Visit https://www.pinecone.io/ and click "Get Started" or "Sign Up".
Create an account with your email or sign in with Google.
Verify your email address.
Step 2: Access the Dashboard
Log in to your Pinecone account.
Navigate to the dashboard to manage projects and indexes.
Step 3: Create a New Project
Click "Create Project" in the dashboard.
Enter a project name and optional description.
Click "Create".
Step 4: Set Up a Free Index
Go to the "Indexes" section.
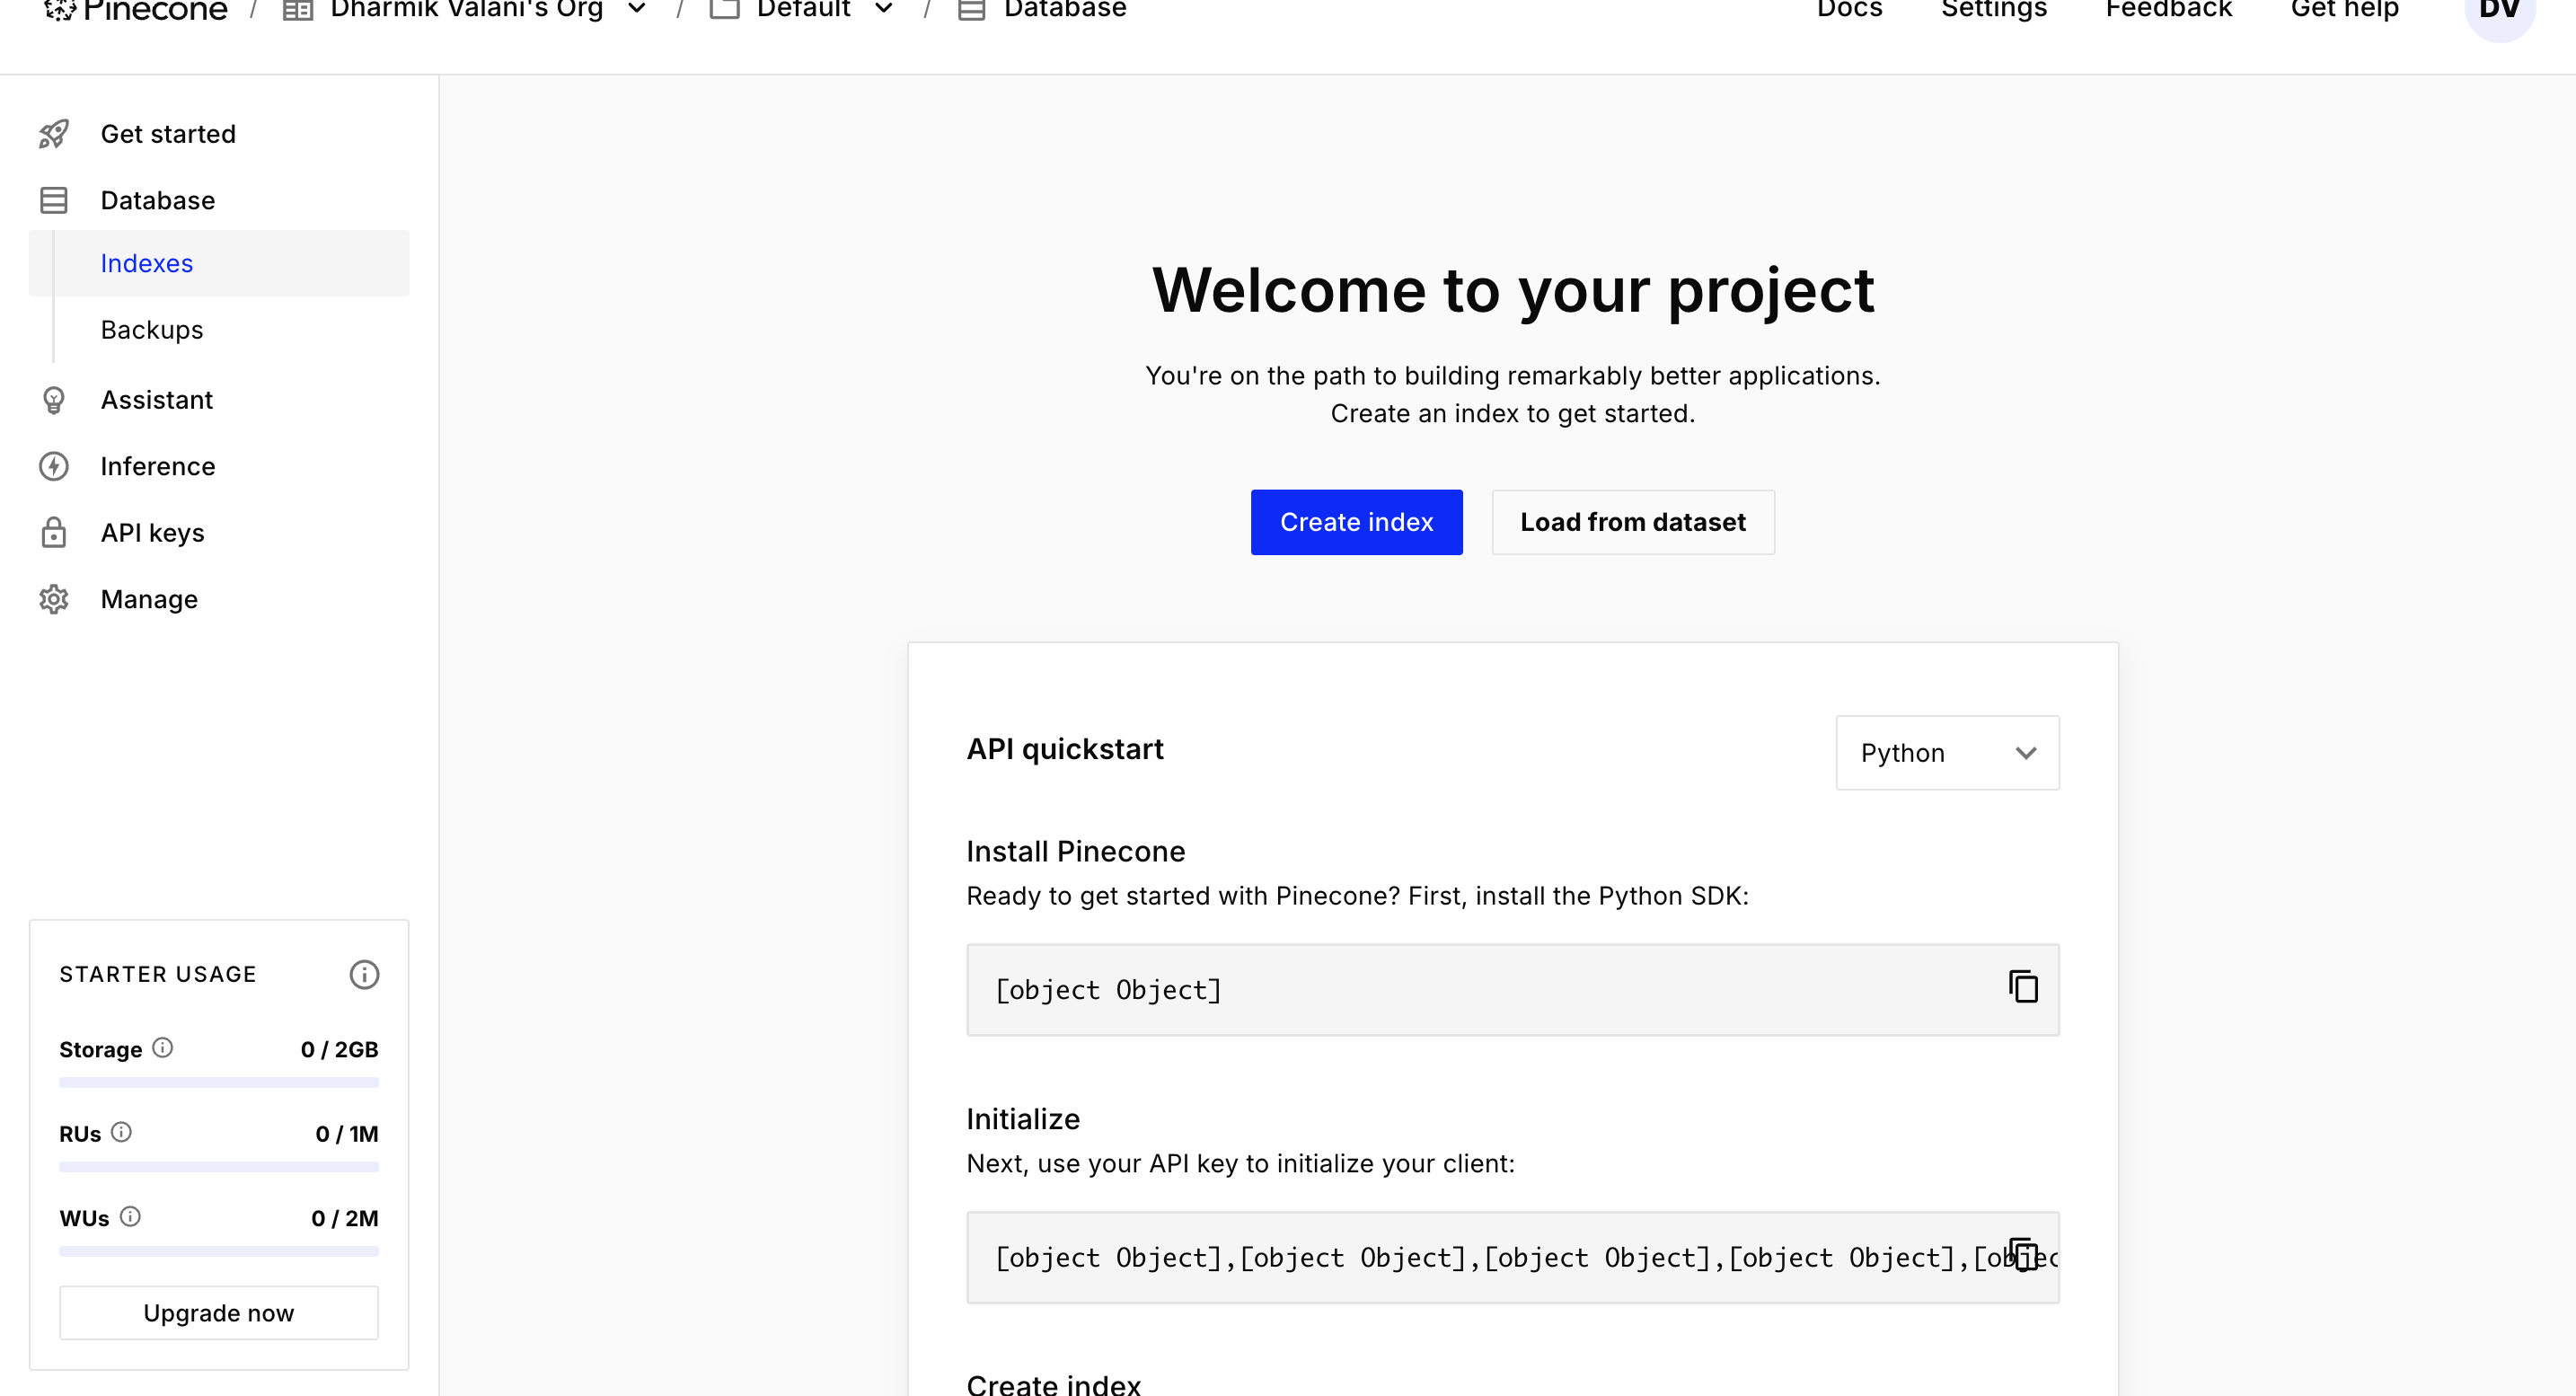
Click "Create Index".
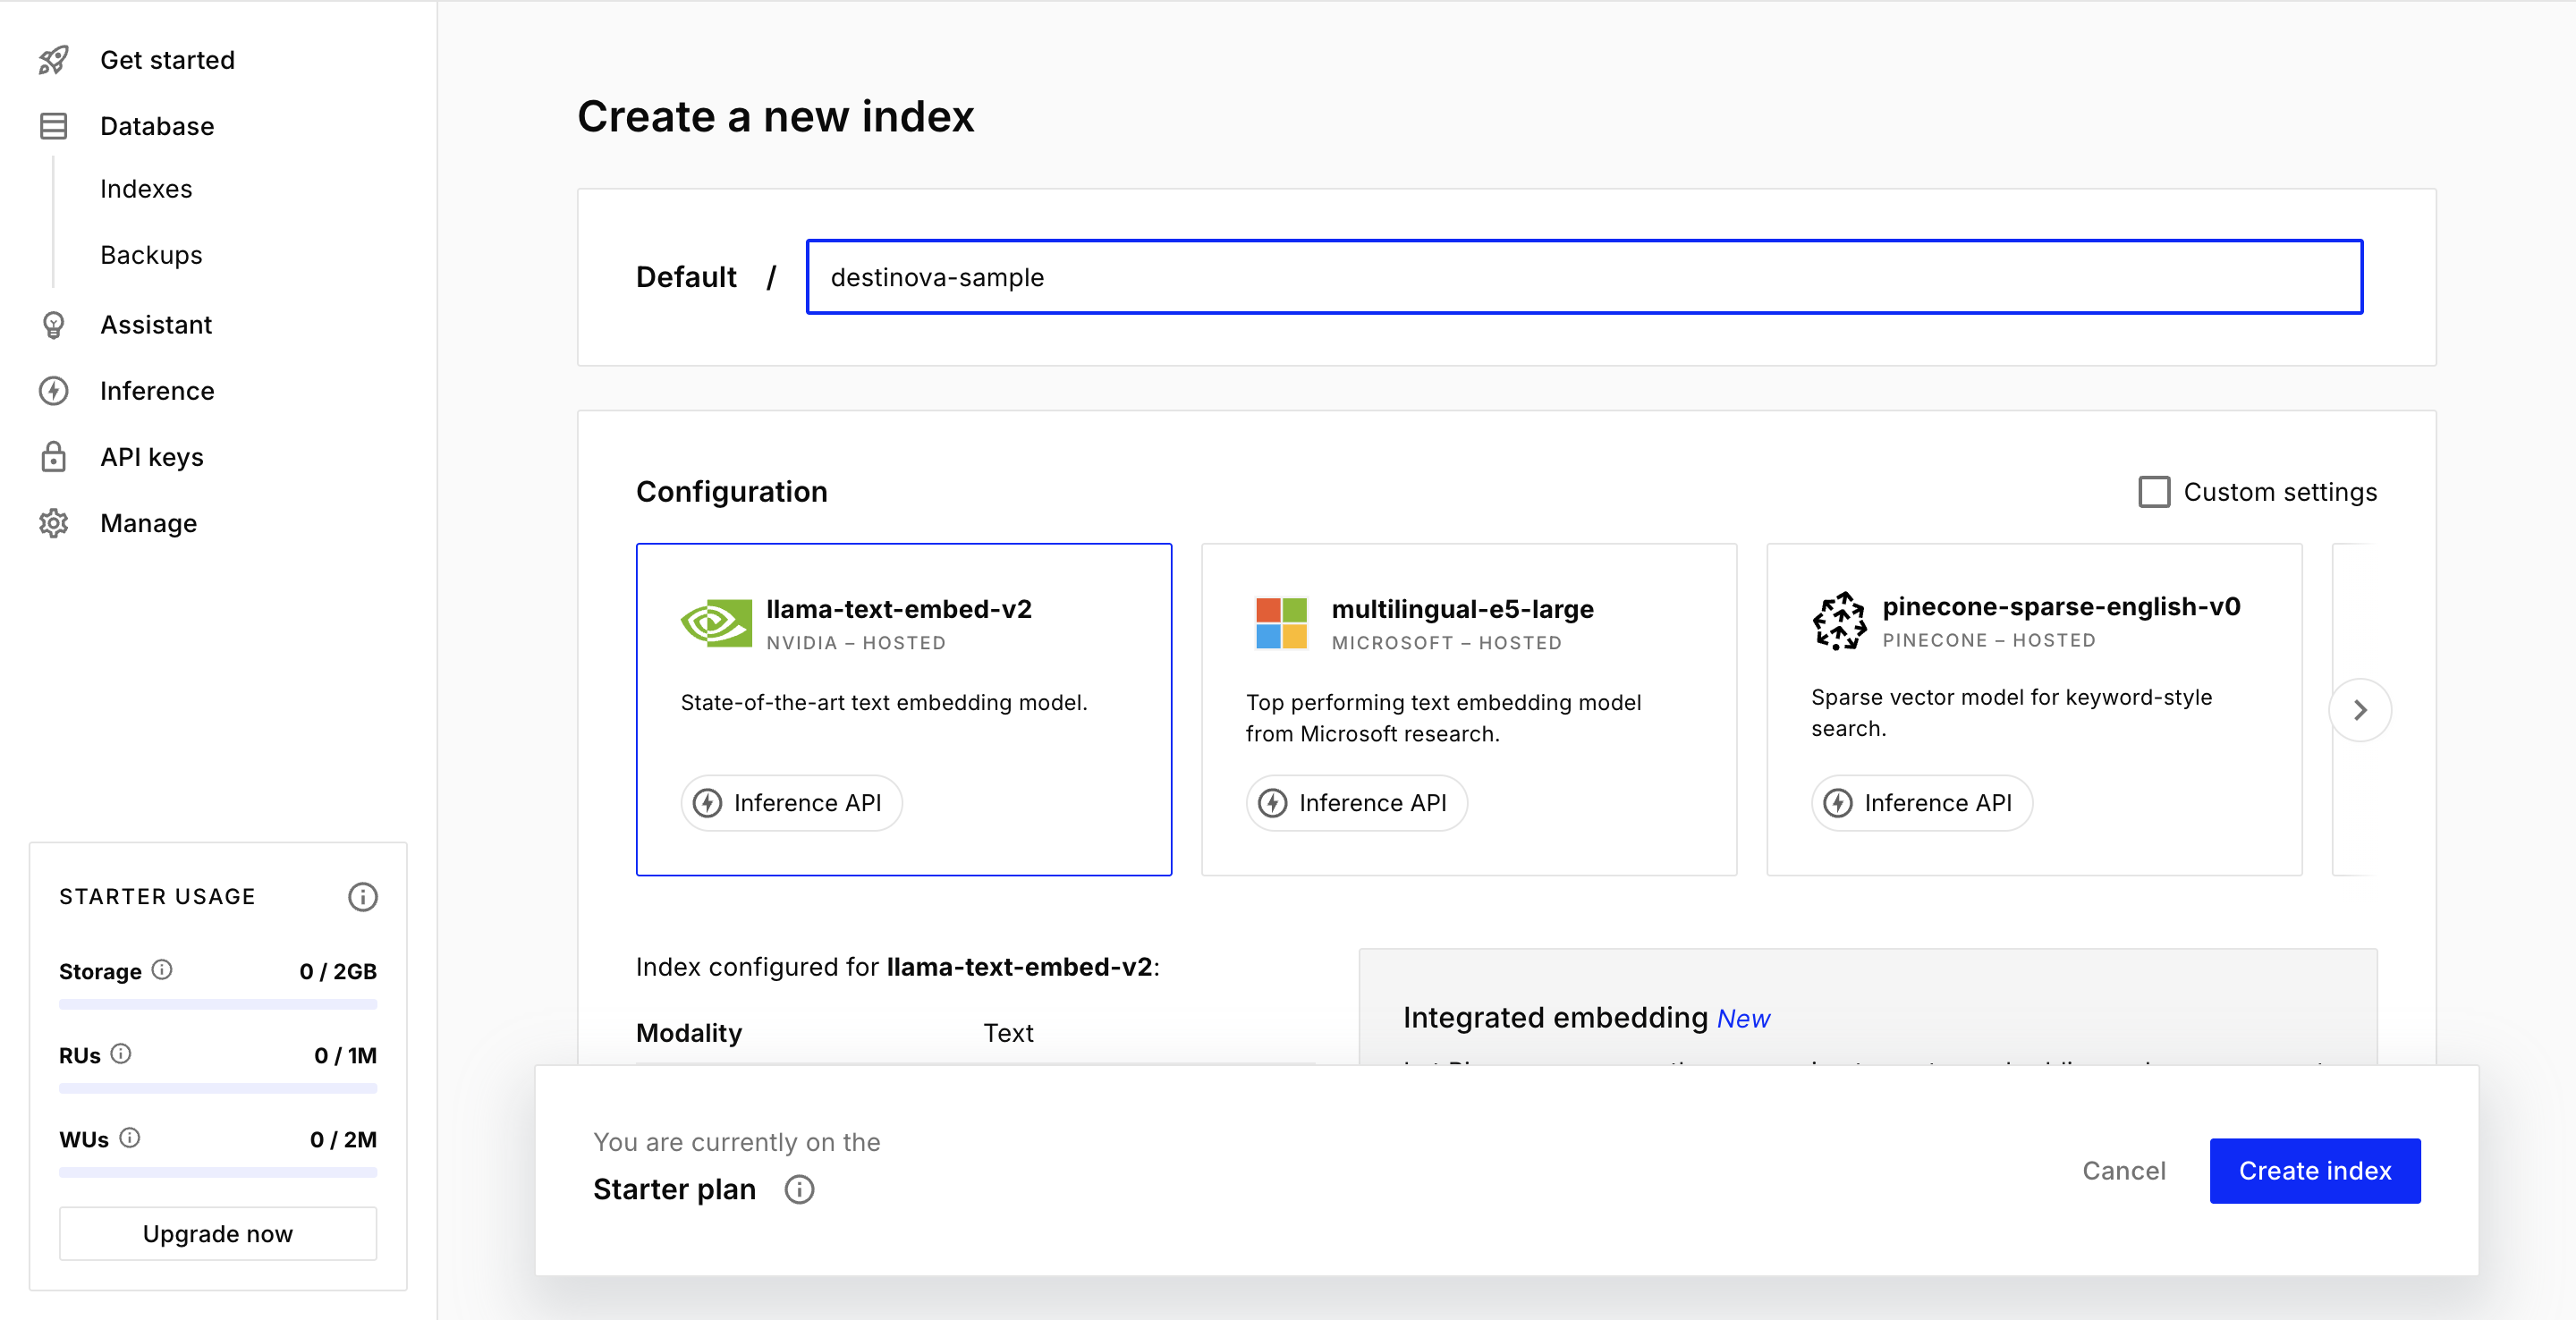
Name your index (e.g., "my-first-index").

Select a dimension size (e.g., 768) and "Starter" environment.
Choose a region and click "Create Index"
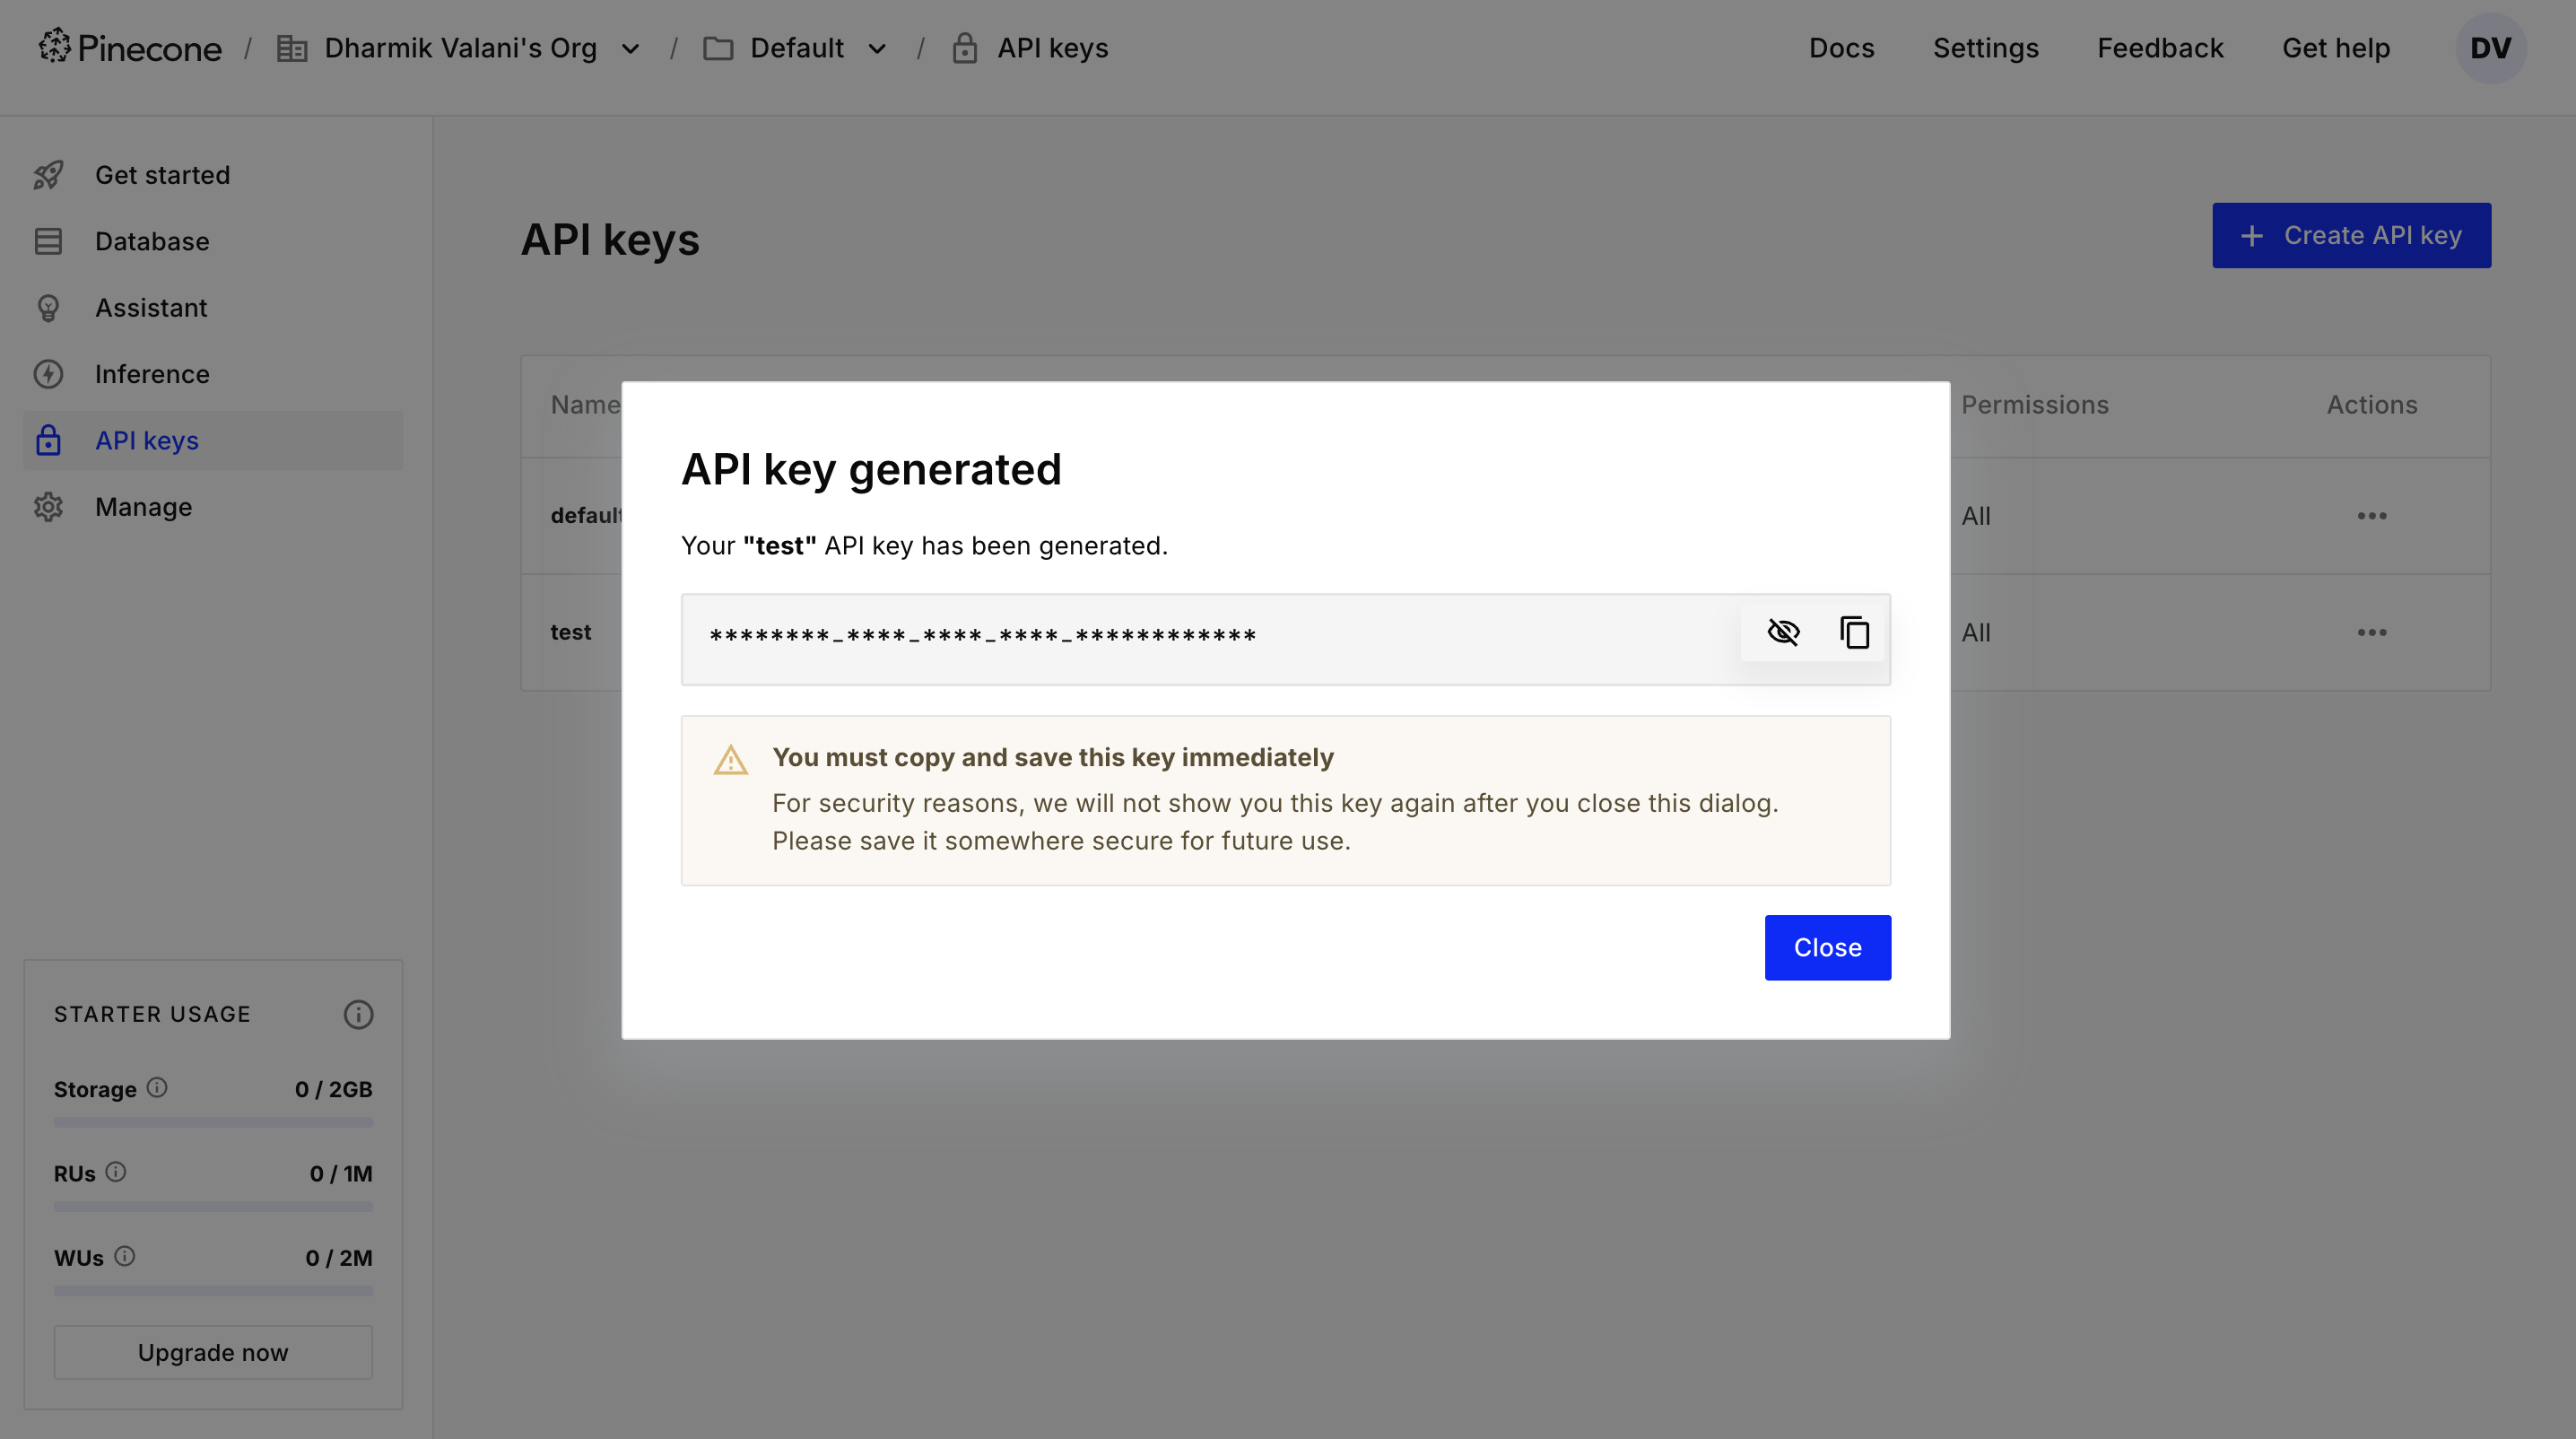
Pinecone Setup Complete:
Once you've completed all setup steps in Pinecone, your dashboard should look like this:
This confirms that your index is working, and your data has been successfully inserted.