Customize Your Chatbot Colors, Avatar & Layout
Match your chatbot with your website’s theme by customizing colors, avatar, position, and size.
You can fully customize your chatbot to match your website’s theme and design using the Colors & Avatar settings. This helps create a consistent brand experience and improves user engagement.
This guide explains how to change your chatbot’s colors, avatar, position, size, and button style.
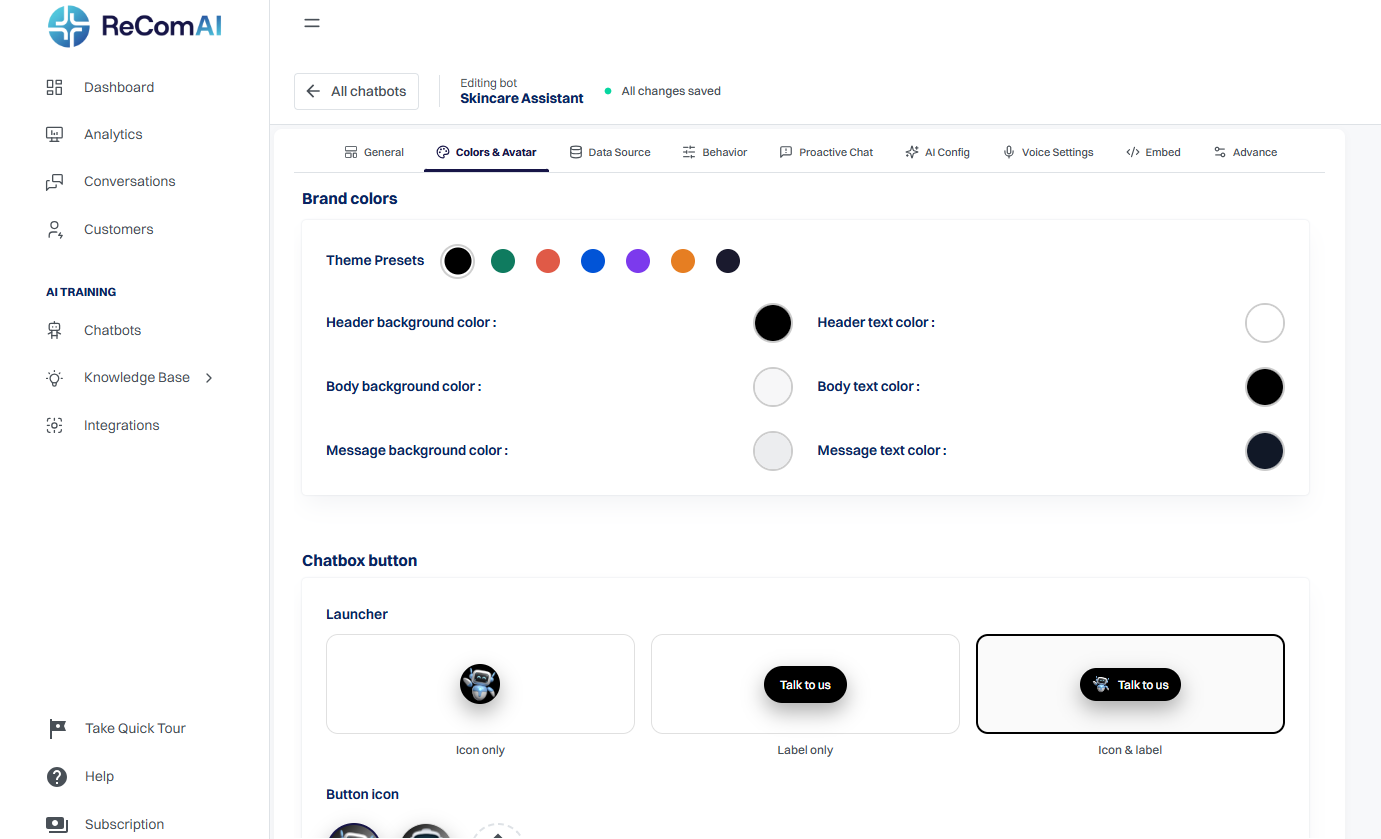
Access the Colors & Avatar Settings
Go to Dashboard
Navigate to Chatbots
Open the chatbot you want to customize
Click on the Colors & Avatar tab from the top menu
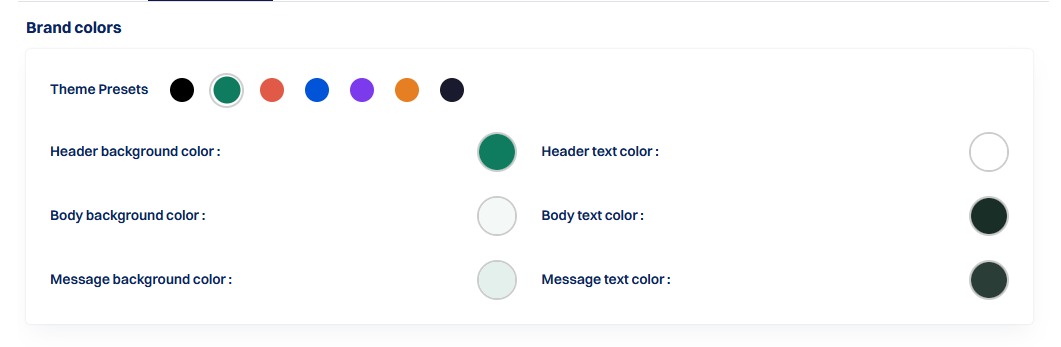
Customize Chatbot Theme Colors
You can style your chatbot to match your website’s theme in two ways:
Option 1: Use Preset Theme Colors
We provide predefined theme color options.
Simply select a color to instantly update the chatbot’s appearance.
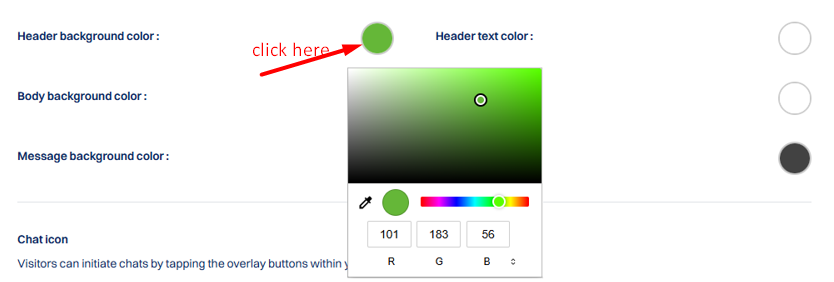
Option 2: Use Custom Color Codes (RGB)
You can manually enter your own RGB color values.
This allows you to match your chatbot exactly with your website’s brand colors.
You can customize:
Header background color
Header text color
Body background color
Body text color
Message background color
Message text color
Best Practice: Use your website’s primary and secondary colors for a consistent look.
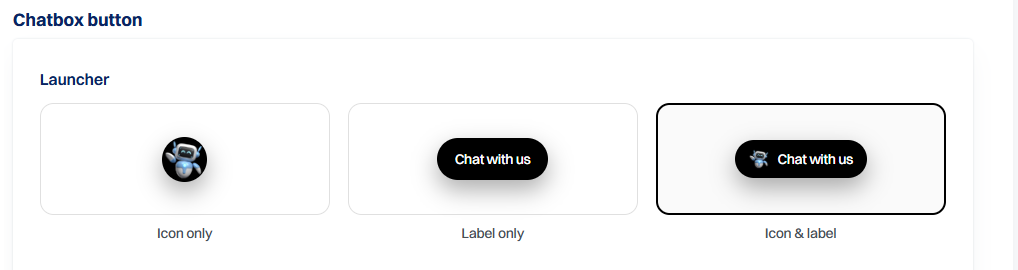
Customize Chatbot Button & Avatar (Chat Icon)
Your chatbot button (launcher) is the entry point for users to start a conversation. In this section, you can customize both the button style and the avatar to match your brand and user experience.
Choose Button Style
Select how you want the chatbot button to appear on your website:
Icon Only – Displays only the chatbot avatar (clean and minimal)
Label Only – Displays only text (e.g., Chat with us)
Icon & Label – Displays both avatar and text together (recommended for better visibility)
👉 Choose the option that best fits your website design and usability.
Select or Upload Avatar
Customize the chatbot icon to align with your brand:
Choose a Default Avatar
Select from the built-in chatbot avatars available in the dashboard
Upload a Custom Avatar
Click on Upload Avatar
Upload your own image (logo, mascot, or brand icon)
This helps create a more personalized and branded experience for your users.

Set Button Label
Add a short and clear label (e.g., Chat with us, Need Help?)
Keep it concise and action-oriented to improve engagement

Set Chatbot Position
You can control where the chatbot appears on your website.
Available options:
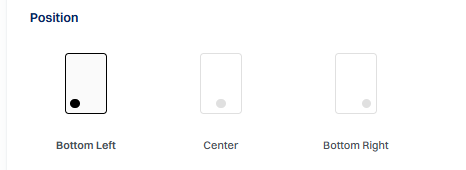
Bottom Right
Bottom Left
Center
Choose the position that best fits your website layout and user experience.
Set Chatbot Button Size
You can also customize the chat button size.
Available options:
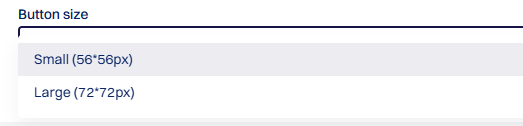
- Small (56 × 56 px)
- Large (72 × 72 px)
Choose a size based on your website layout and visibility preference.
Adjust Chatbot Width & Height
You can resize the chatbot window to fit your design needs.
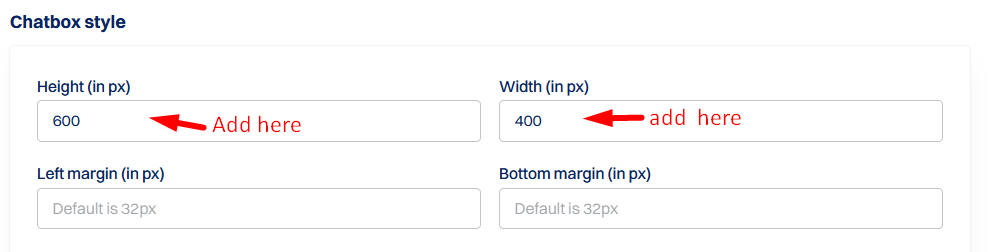
Chat Width – Set the width of the chatbot window
Chat Height – Set the height of the chatbot window
Important: Width and height values must be entered in pixels (px).
Example:
Width: 455 px
Height: 400 px
You can increase or decrease these values as needed.
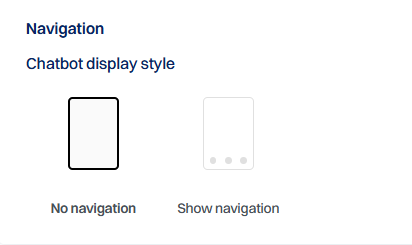
Chatbot Navigation (Bottom Menu)
The Navigation setting allows you to control whether the bottom menu (Home, Chat, Track) is visible inside your chatbot.
1.Choose Chatbot Display Style
You can select how the chatbot navigation should behave:
No Navigation
Hides the bottom navigation bar
Removes options like Home, Chat, and Track
Best for a clean, minimal chat experience
Show Navigation
Displays the bottom navigation menu
Users can easily switch between Home, Chat, and Track sections
Recommended for better usability and feature access
2.Apply Navigation Settings
Select your preferred option (Show or Hide)
The changes will be applied instantly to your chatbot interface
Save Your Changes
Once you have customized:
Colors
Avatar
Chatbot Launcher
Position
Width & height
Button size
navigation
Click the Update button to save your changes.
Final Result
✅ Your chatbot will now:
Match your website’s theame
Use your selected colors and avatar
Appear in the chosen position
Display with the correct size and layout across your website