Customer Data Collection & Support Settings
Manage contact forms, support access, and chat notifications to deliver a smooth and professional support experience.
This guide explains key chatbot settings that help you manage customer communication, collect contact details, and build user trust. Each option is designed to improve support efficiency and ensure you never miss an important conversation.
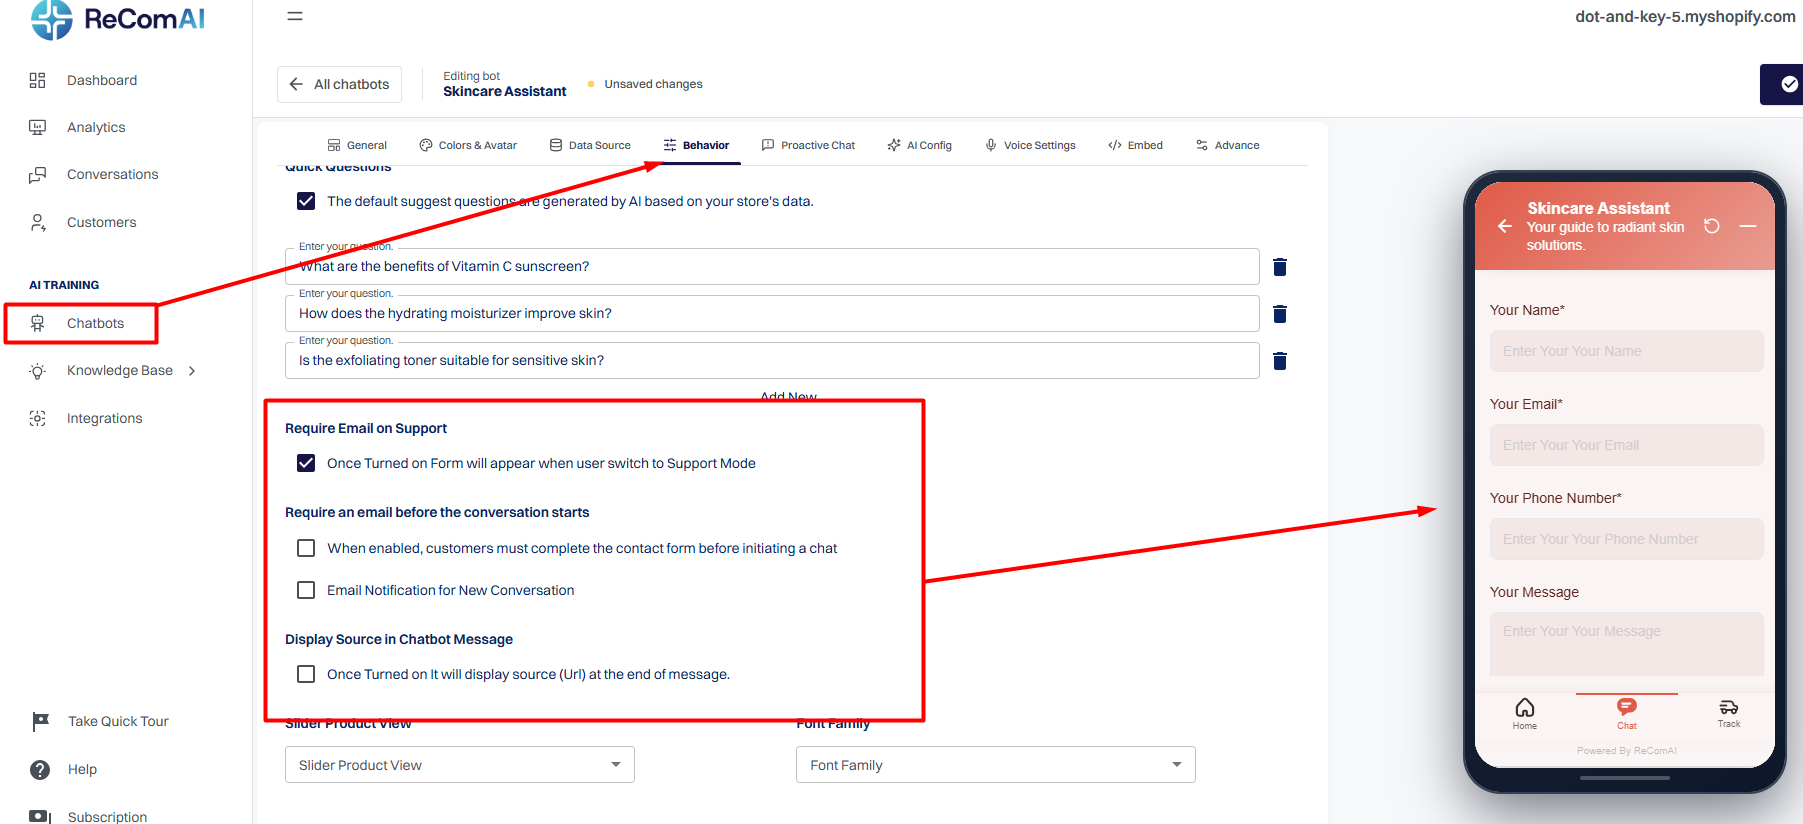
1.Require Email on Support
What this setting does:
When this option is enabled, the contact form appears only when a customer switches to Support mode after chatting with the AI.

How it works:
A user can freely chat with the AI assistant.
If the user clicks on Support for human help, the system will ask for:
Name
Email address
Phone number
The user must submit these details before continuing the support conversation.
Why use it:
Collects verified contact details only from users who need human support.
Helps your support team respond effectively and follow up if needed.
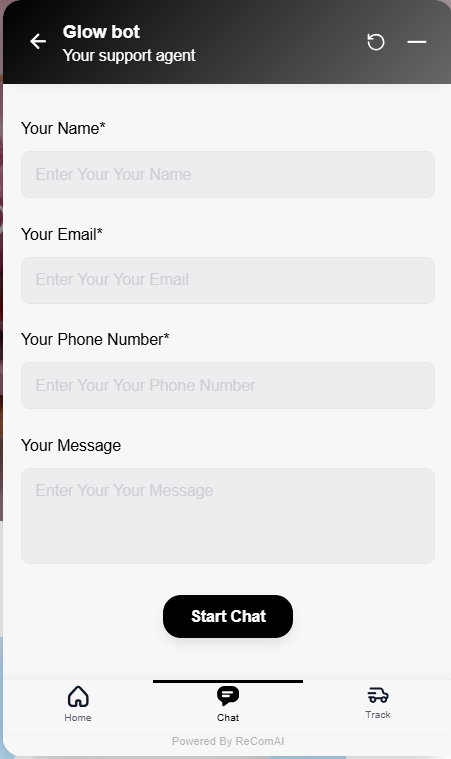
2.Require an Email Before the Conversation Starts (Pre‑Conversation Form)
What this setting does:
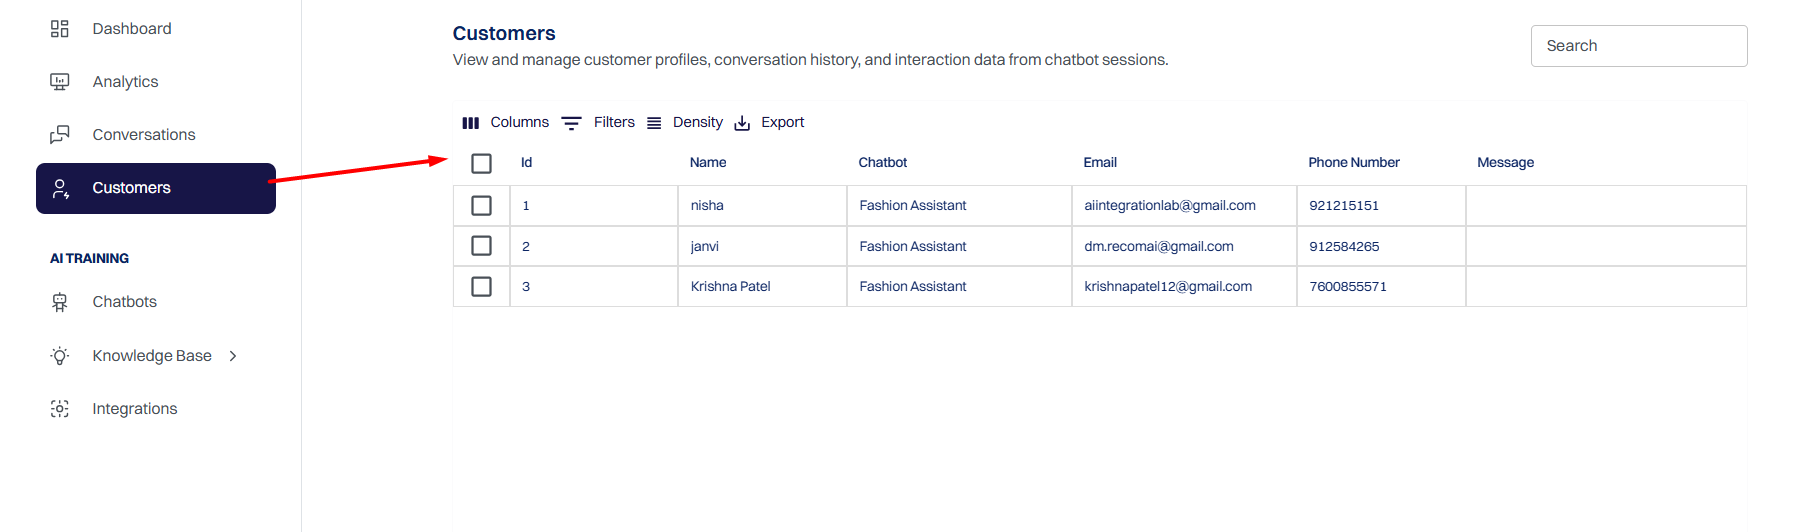
When enabled, users must fill out a contact form before starting any conversation, whether with the AI or Support.
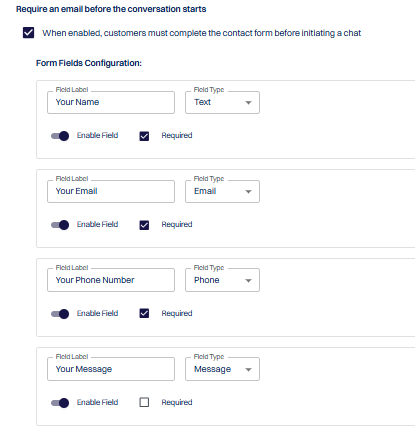
How it works:
As soon as a user opens the chat, a pre‑conversation form appears.
The user must enter their contact details to proceed.
Only after submitting the form can the user start chatting with the AI or Support.
All submitted details are automatically stored in the Customers section.
Important Note:
If both this option and Require Email on Support are enabled at the same time:
Only the Pre‑Conversation Form will work.
The bot will not ask for contact details again when the user clicks Support, because the information has already been collected.
The Support‑only form will work only when the pre‑conversation form is disabled.
Why use it:
Ensures every conversation is linked to a real user.
Ideal for lead generation and tracking customer interactions.
3.Email Notification for New Conversation
What this setting does:
When enabled, you will receive an email notification every time a new chat conversation starts.

How it works:
A new user initiates a chat.
An automatic notification is sent to your registered email address.
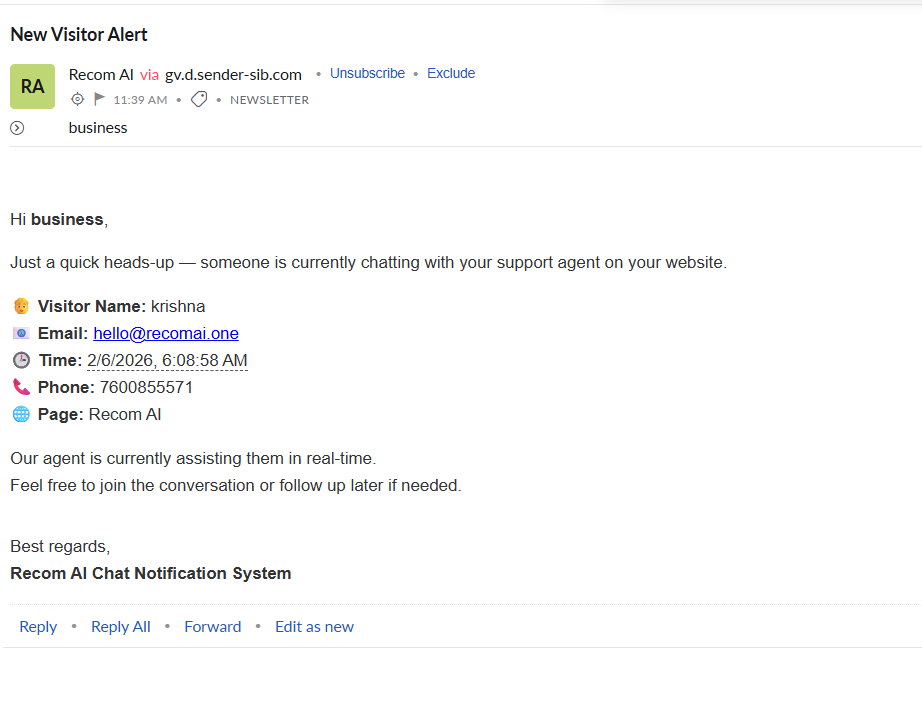
Why use it:
Keeps you informed in real time.
Helps you respond quickly to new customer inquiries.
Prevents missed conversations or leads.
4.Display Source in Chatbot Message
What this setting does:
When enabled, the chatbot displays the source URL along with each answer it provides.

How it works:
The bot answers the user’s question.
A source link is shown at the end of the message, indicating where the information was taken from.
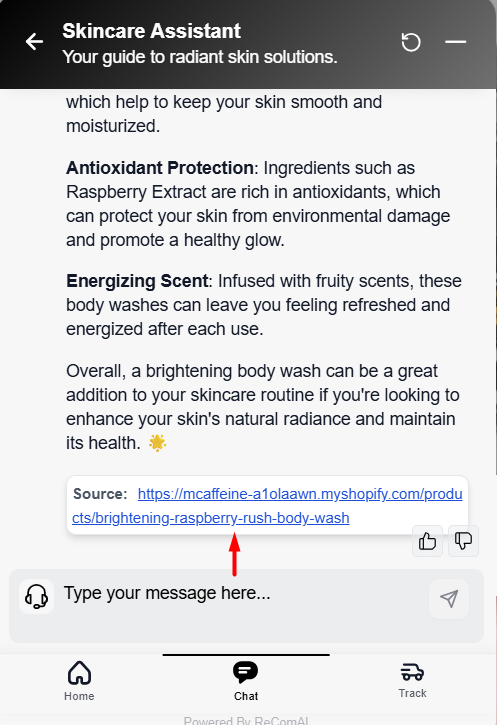
Why use it:
Builds trust and transparency with users.
Confirms that answers are coming from your website content.
Ensures users that the bot is not sharing incorrect or external information.
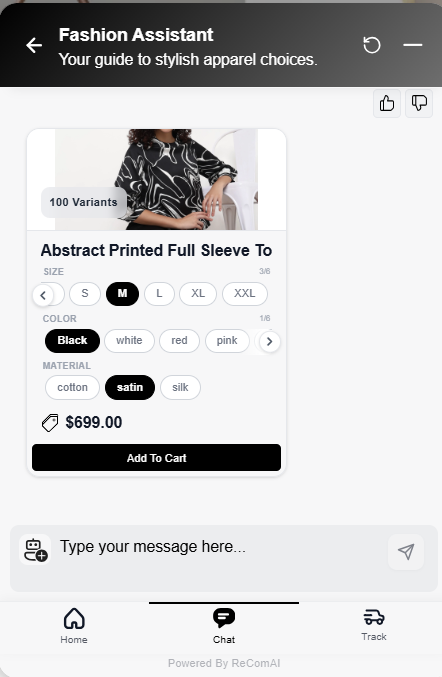
5.Slider Product View
What this setting does:
The Slider Product View setting lets you choose how product recommendation cards appear inside the chatbot. You can select either Small or Large card layouts based on your preferred shopping experience.
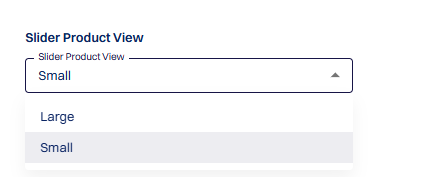
Small Product View
When Small is selected, product cards are displayed in a compact layout, allowing more products to be shown within the available space.
How it works:
roduct cards appear in a smaller, space-efficient design.
If a product has multiple variants, the chatbot displays a "X Variants" badge (for example, 2 Variants or 100 Variants) instead of showing all variant options.
Customers can open the product to view and choose their preferred variant.
Why use it:
Displays more products in a single view.
Keeps the chatbot interface clean and compact.
Ideal for stores with large product catalogs.
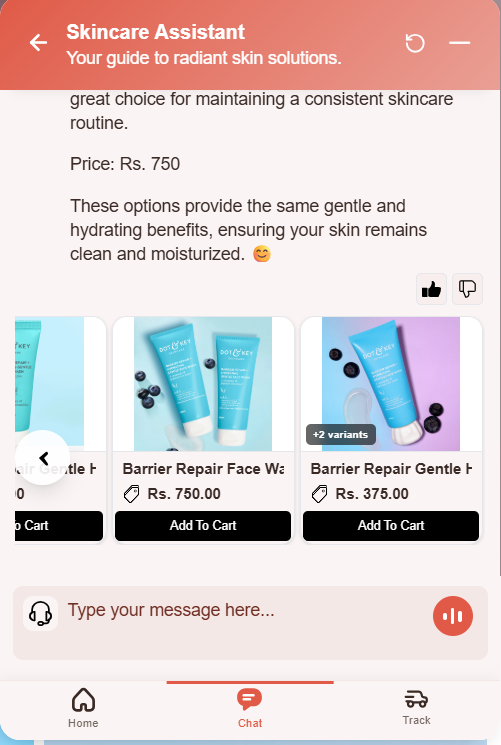
Large Product View
When Large is selected, product cards provide a richer shopping experience by displaying available product variants directly within the chatbot.
How it works:
Product cards appear in a larger layout with more product details.
Available variants such as Size, Color, and Material are displayed directly on the product card.
Customers can select their preferred variant before adding the product to the cart, without opening the product page.
Why use it:
Makes product selection faster and easier.
Reduces the number of clicks before adding products to the cart.
Improves the shopping experience for products with multiple variants.
Helps customers make purchase decisions more quickly.
6.Font Family
What this setting does:
The Font Family setting lets you choose the font used in your chatbot, helping it match your website's branding.
How it works:
Select a font from the Font Family dropdown.
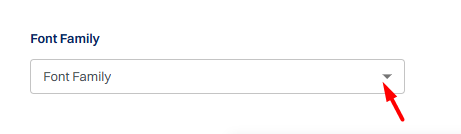
Click Update to save your changes.
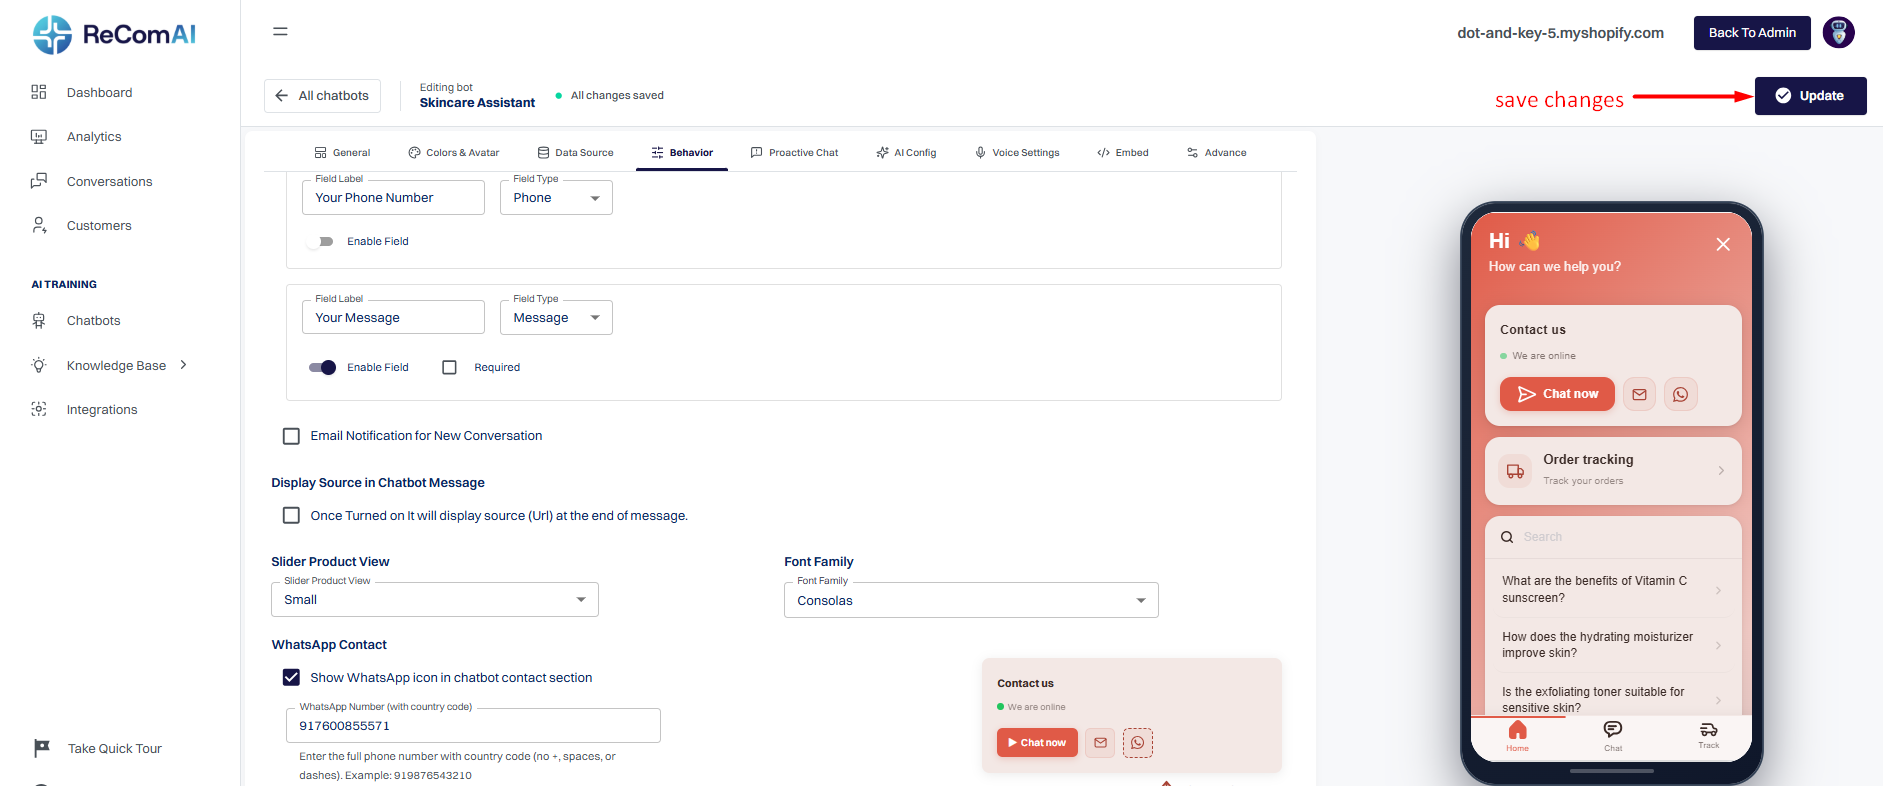
The selected font is applied across the chatbot.
Why use it:
Matches your website's branding.
Creates a consistent user experience.
Gives the chatbot a more professional look.
Summary
These settings give you full control over how and when customer details are collected, how you stay informed, and how trustworthy your chatbot appears. Configure them based on your business needs to deliver a smooth, professional support experience.
For best results:
Use Pre‑Conversation Form for lead capture.
Use Require Email on Support for support‑only verification.
Enable Email Notifications to stay updated.
Enable Display Source to increase user confidence.