Create Multiple Chatbots for Different Store Data in ReComAI
Organize your store knowledge with focused chatbots (Available in Growth Plan)
If you have different types of information or departments in your store (like support, shipping, returns, or policy details), it’s a good idea to create separate chatbots for each one. This helps in organizing your data better and gives customers faster, more accurate answers.
Why Use Multiple Chatbots?
Using multiple chatbots allows you to:
✅ Separate information like shipping, product support, returns, or policies.
✅ Keep each bot focused on a specific task.
✅ Provide faster and more accurate responses.
✅ Avoid mixing up data and confusing the customer.
Step-by-Step: How to Create Multiple Chatbots
Step 1: Go to Chatbots Section
From your ReComAI dashboard, click on “Chatbots” in the left sidebar.
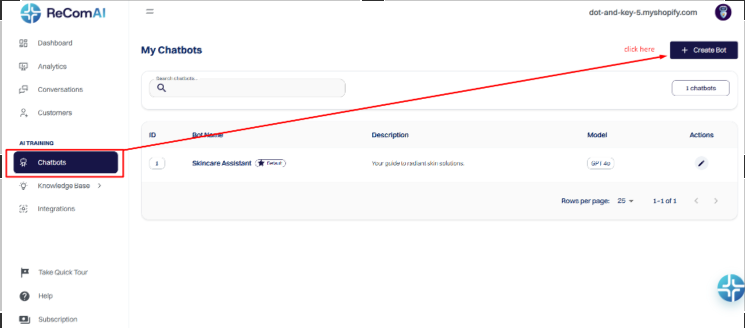
Step 2: Click on “+ Create”
You will see a button on the top right that says + Create.
Click it to start creating a new chatbot.
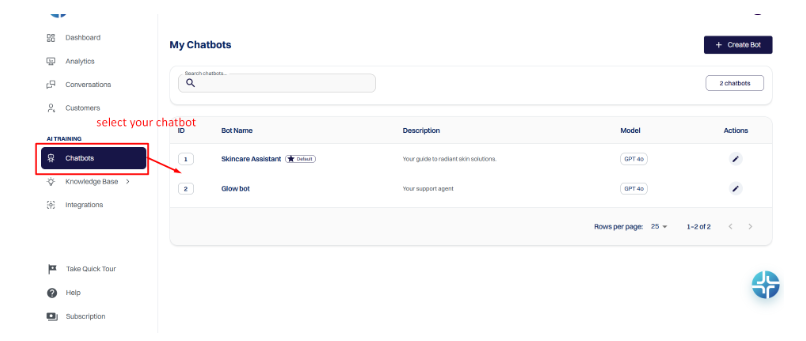
Step 3: Open and Customize Your Chatbot
After creating the chatbot:
Go back to the Chatbots section
You will see your newly created chatbot in the list
Click on the chatbot
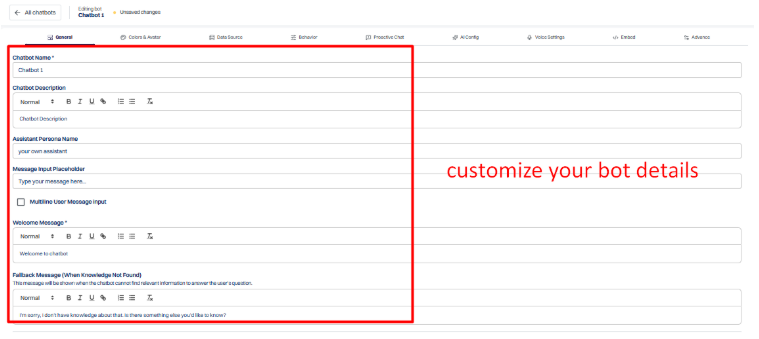
Customize the details based on your needs
You can update:
Bot name
Description
Settings and behavior
Step 4: Train with Specific Data
Once the bot is created, upload or connect data relevant only to that bot.
For example, for a returns policy bot, add return-related FAQs or policy documents.
For a support bot, train it with customer service guides or troubleshooting content.
Step 5: Save and Use Separately
Each chatbot works separately based on its training.
Show the Selected Chatbot on Your Store (Frontend Setup)
If you want to display a newly created chatbot instead of the default one on your store, follow these steps:
Go to the Chatbots section in your ReComAI dashboard
Select the chatbot you want to display
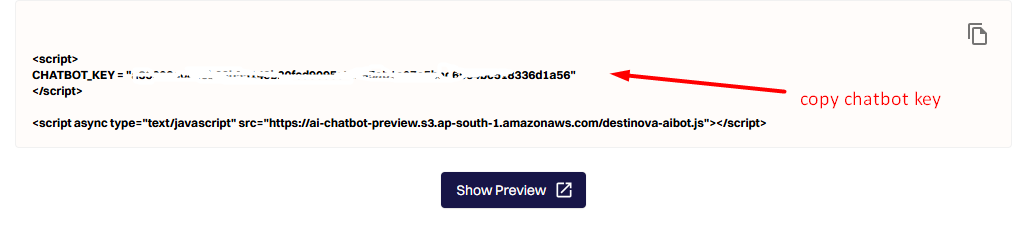
Open the Embed tab inside that chatbot
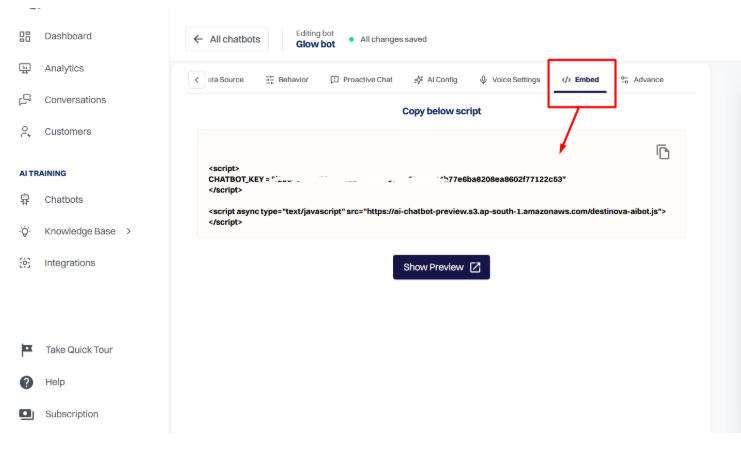
Copy the Chatbot Key
Now, update it in your Shopify store:
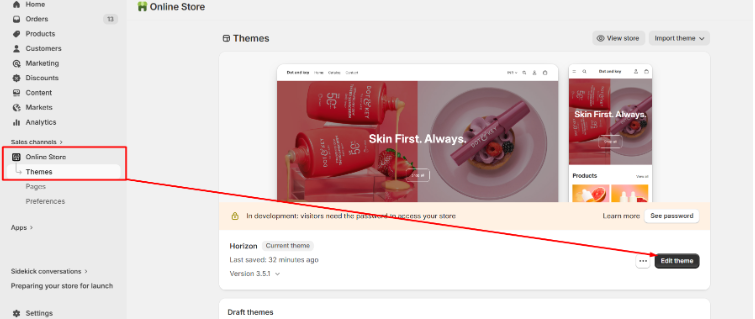
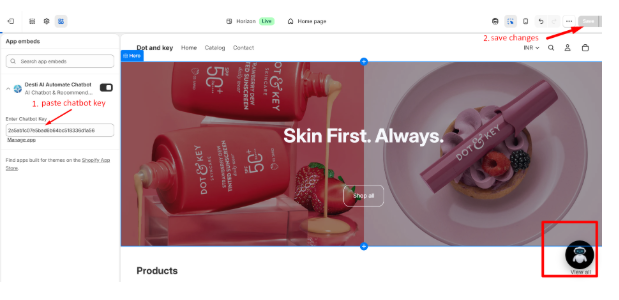
Go to your Shopify Theme settings
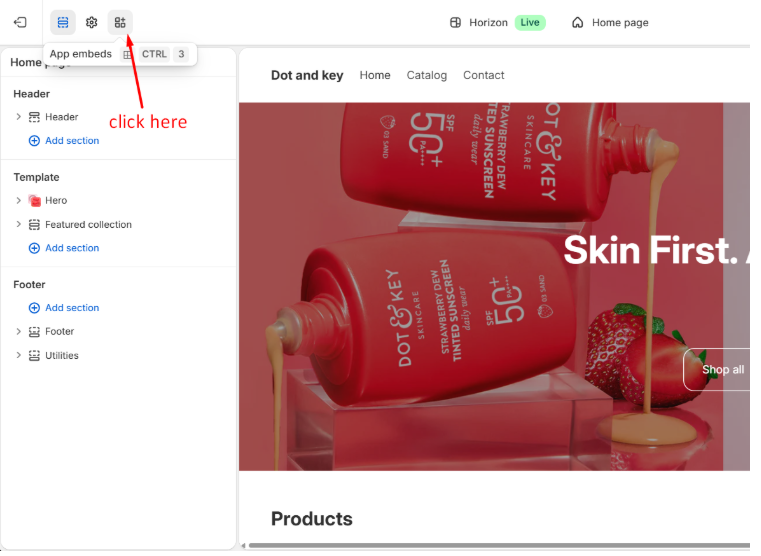
Click on App Embeds
Open the ReComAI app embed
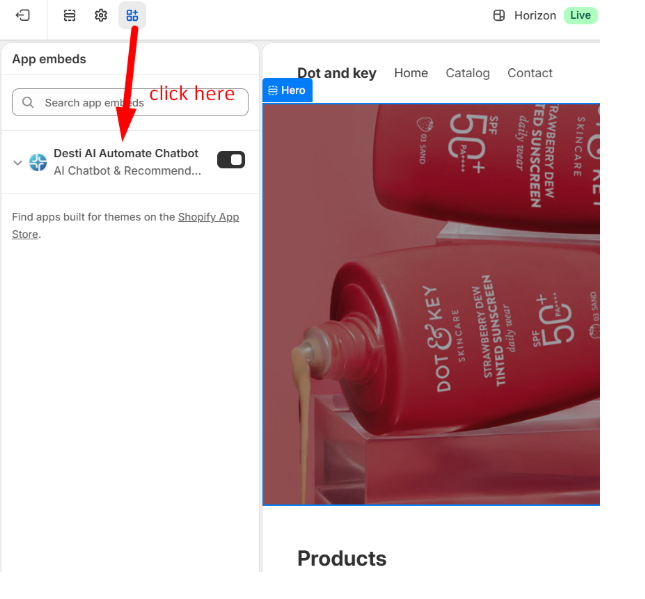
You will see a Chatbot Key field
Paste the copied key into this field
Click Save
Result
The selected chatbot will now be visible on your storefront
You can switch between different chatbots anytime by updating the Chatbot Key
You can also restore the default chatbot by adding its key again